Geo Fencing
Record live screen activities for real time monitoring of device usage. Replay and track the mobile
time effortlessly to establish effective control over device interactions, and usage patterns for
better management.
-
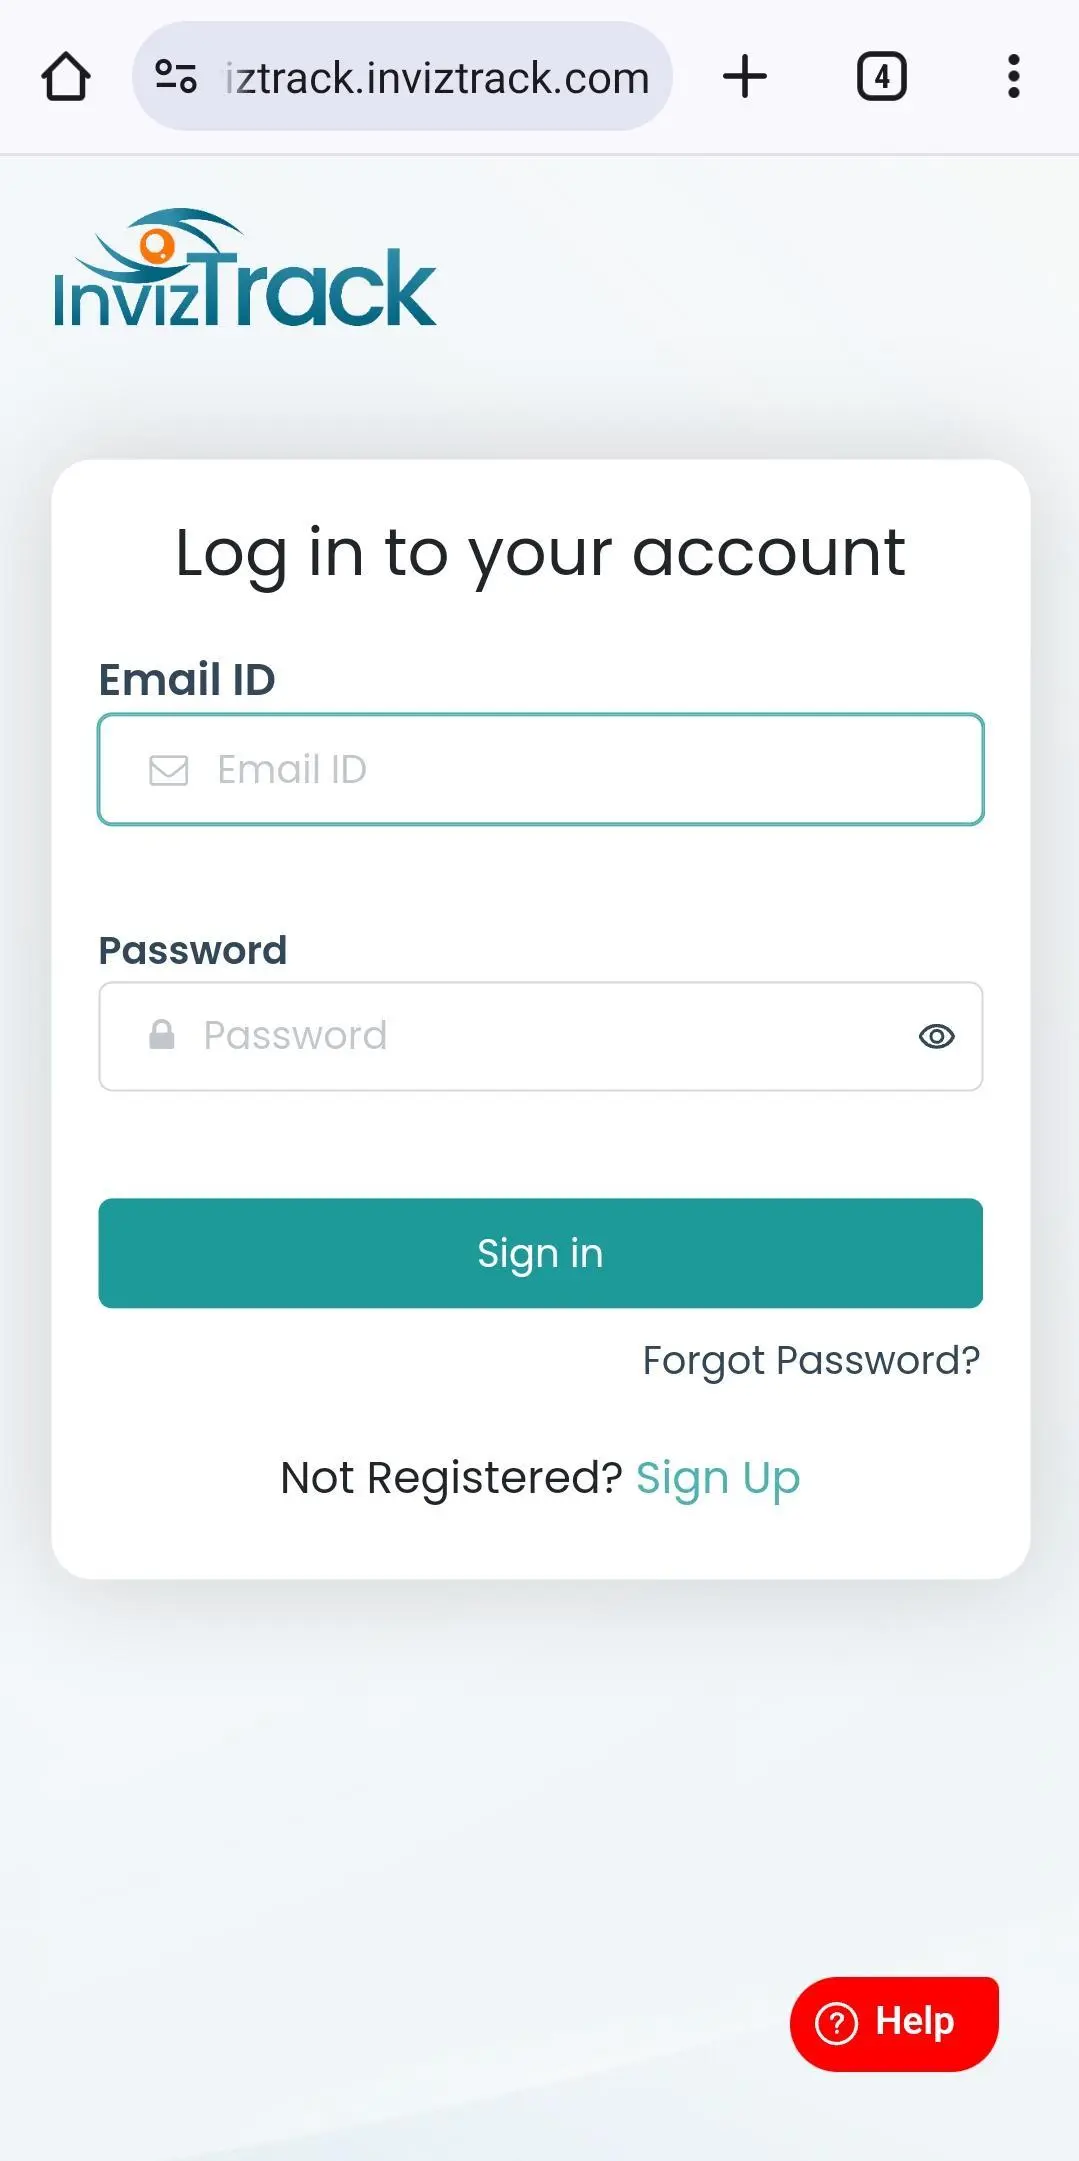
Visit inviztrack.com and login with your username and password.
-
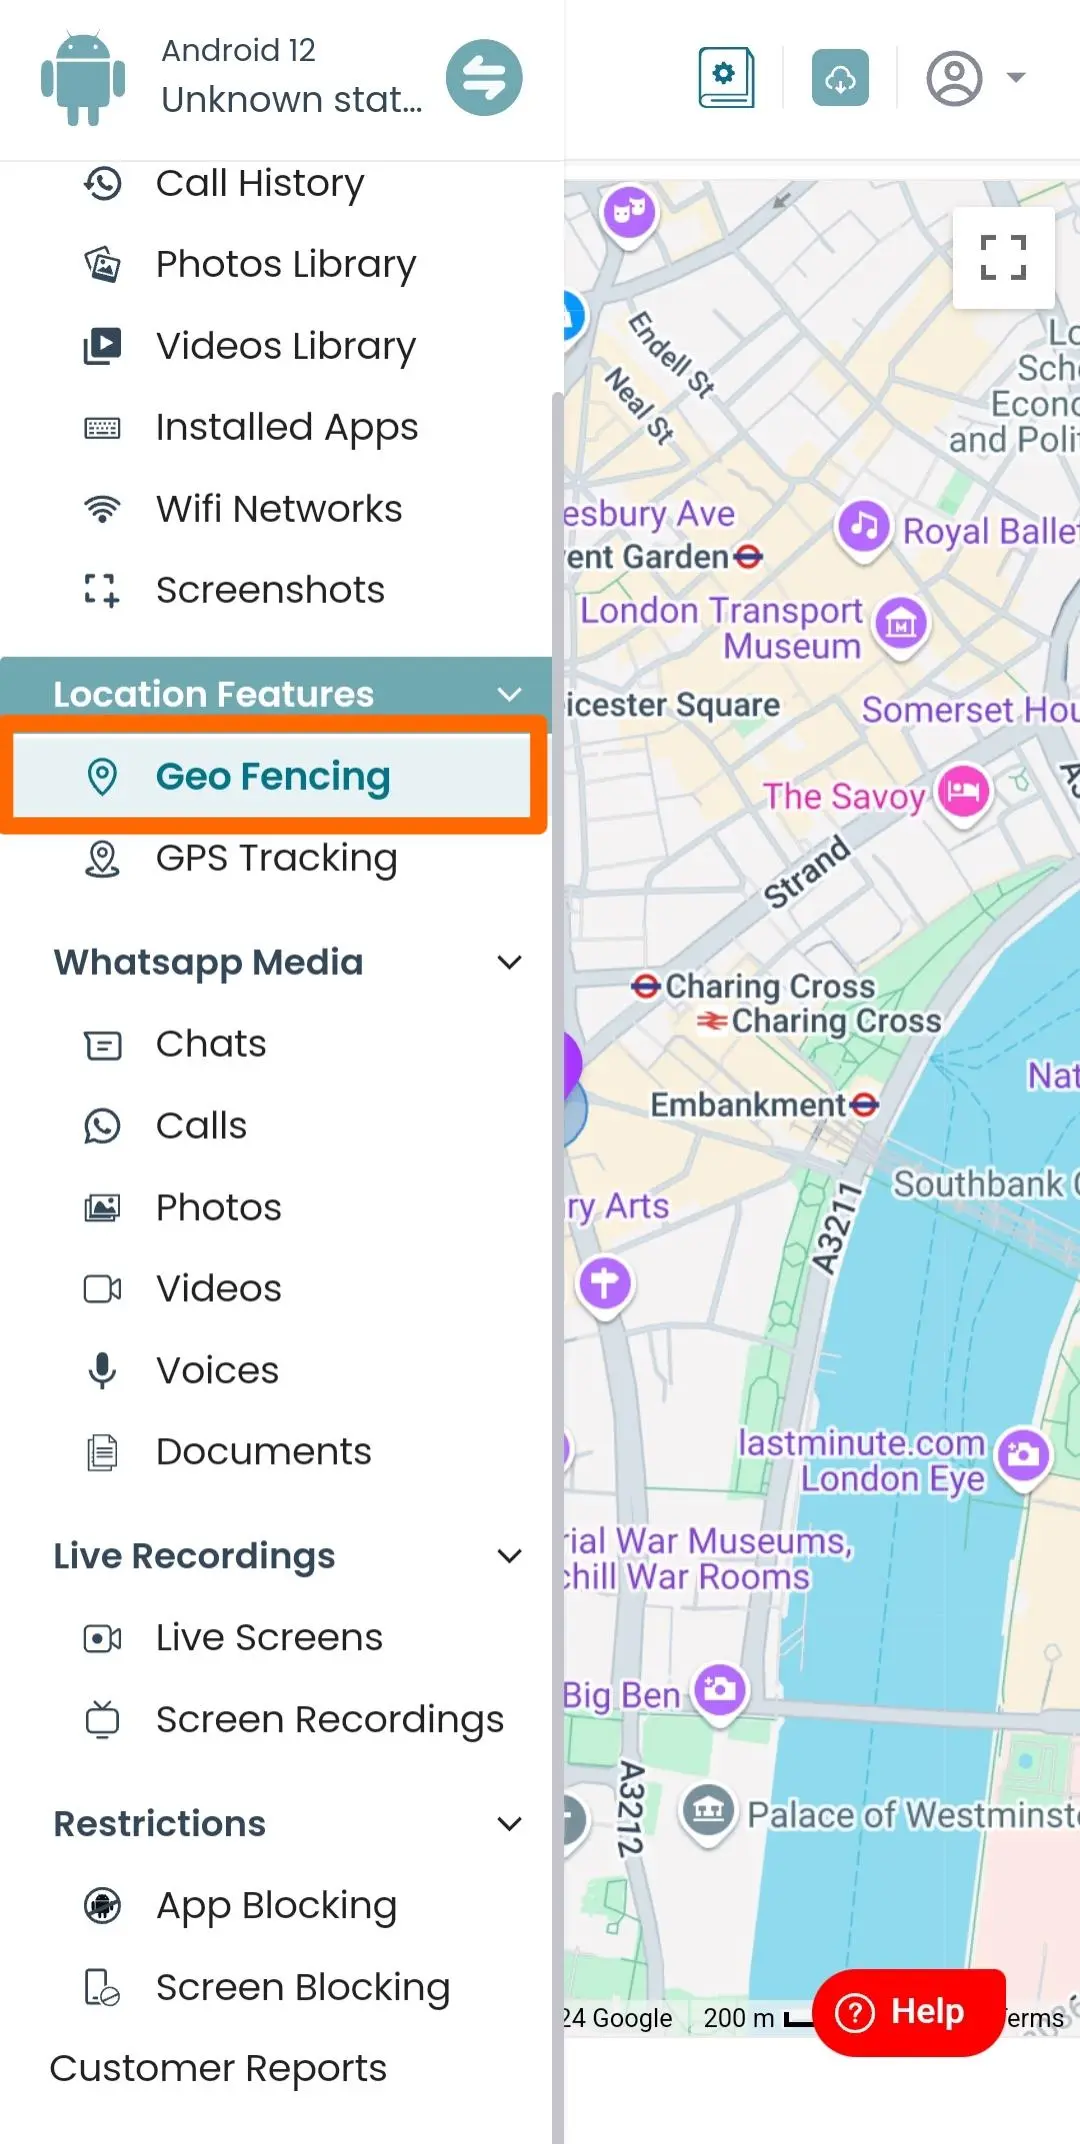
Go to Geo Fencing Menu.
-
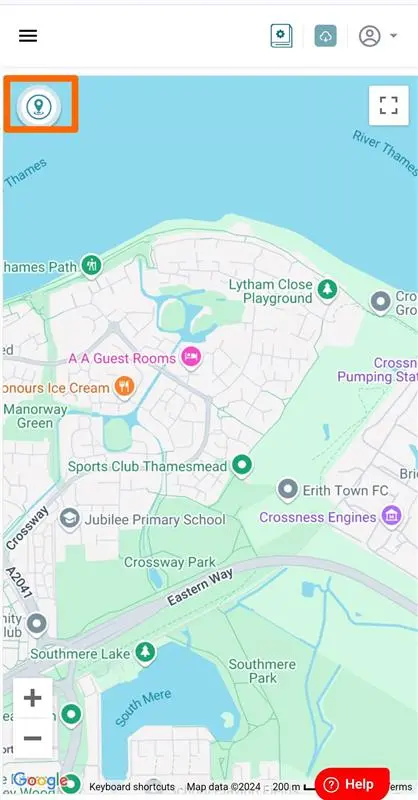
Click on the location menu icon as shown in figure.
-
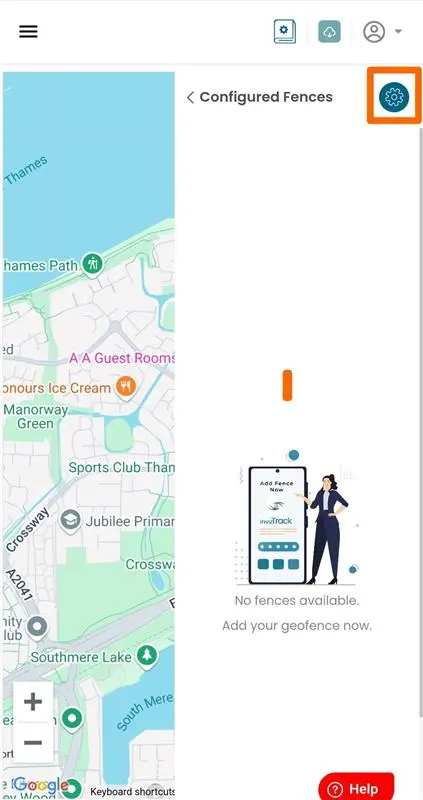
Click on menu icon to add as shown in figure.
-
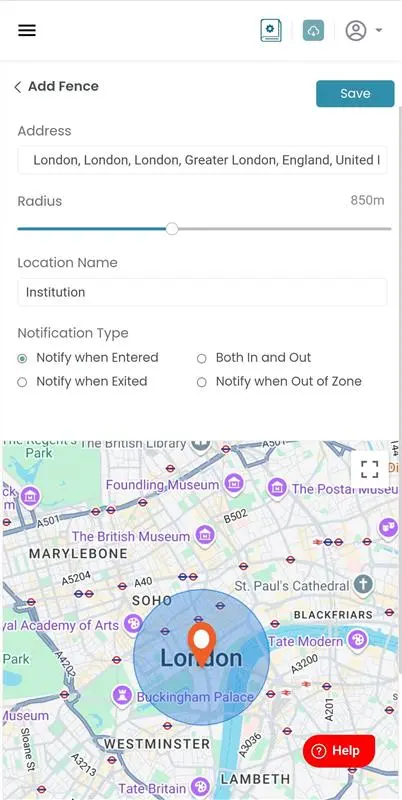
Enter the location you want to monitor.
-
Set the radius around the location to monitor.
-
You can choose to be notified when a device enters or exits the location. Here are the available options:
-
Notify when Entered: Receive an email when the device enters the specified location.
-
Both In and Out: Receive an email when the device both enters and exits the specified location.
-
Notify when Exited: Receive an email when the device exits the specified location.
-
Notify when Out of Zone: Receive an email if the device crosses the location at a specified time.
-
-
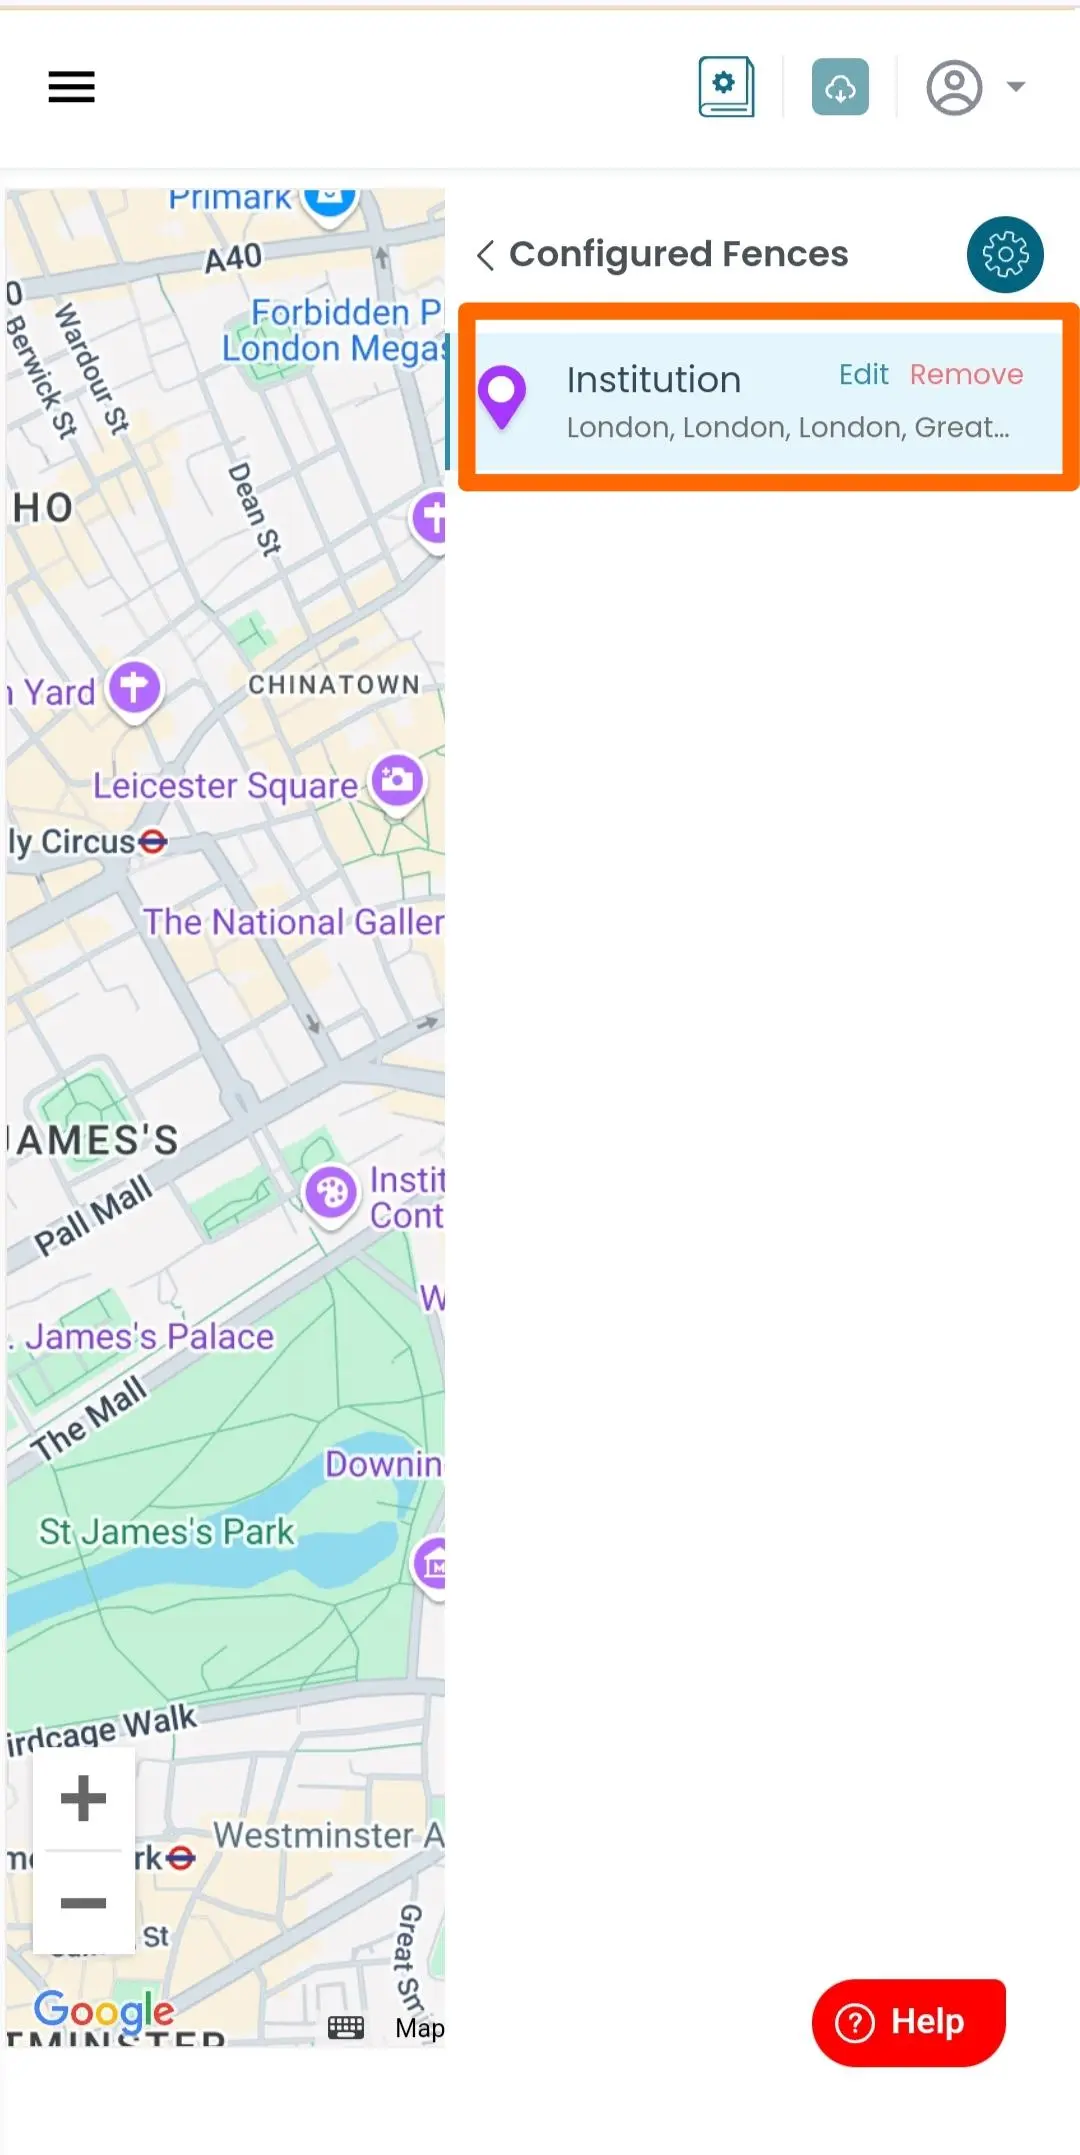
Click 'Save' to apply the configuration. You can view it here.
-
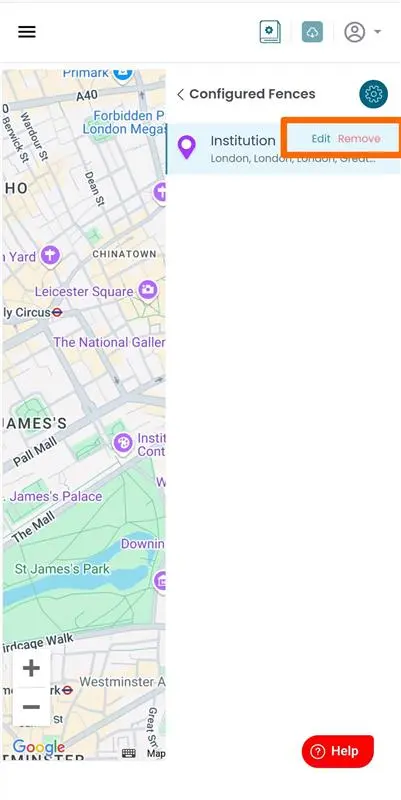
To configure existing settings,
-
To make changes, click the Edit option, make the necessary updates, and then click Save.
-
To delete the configuration, click the Delete option.
-
Screen Recordings
Record live screen activities for real time monitoring of device usage. Replay and track the
mobile time effortlessly to establish effective control over device interactions, and usage patterns
for better management.
-
Visit inviztrack.com and login with your username and password.

-
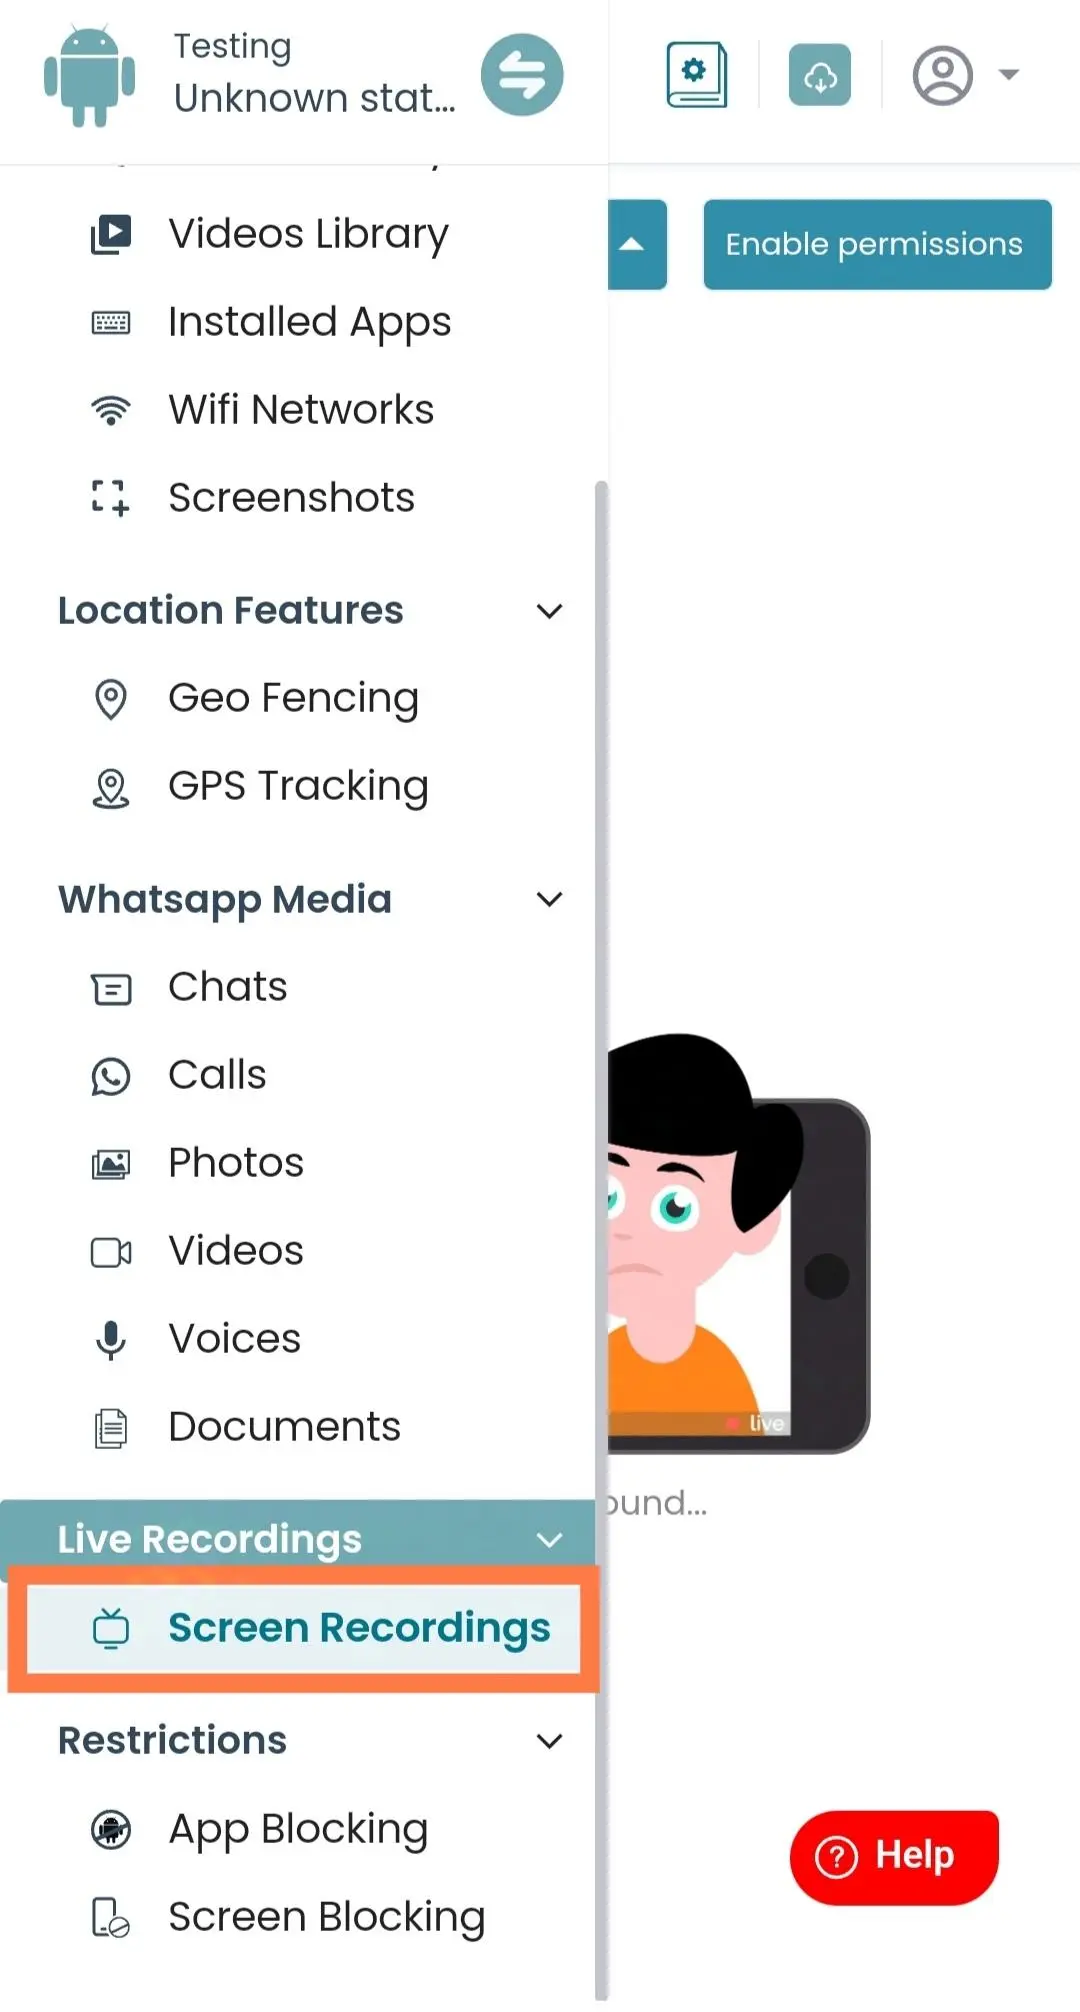
Go to Screen Recordings Menu.
-
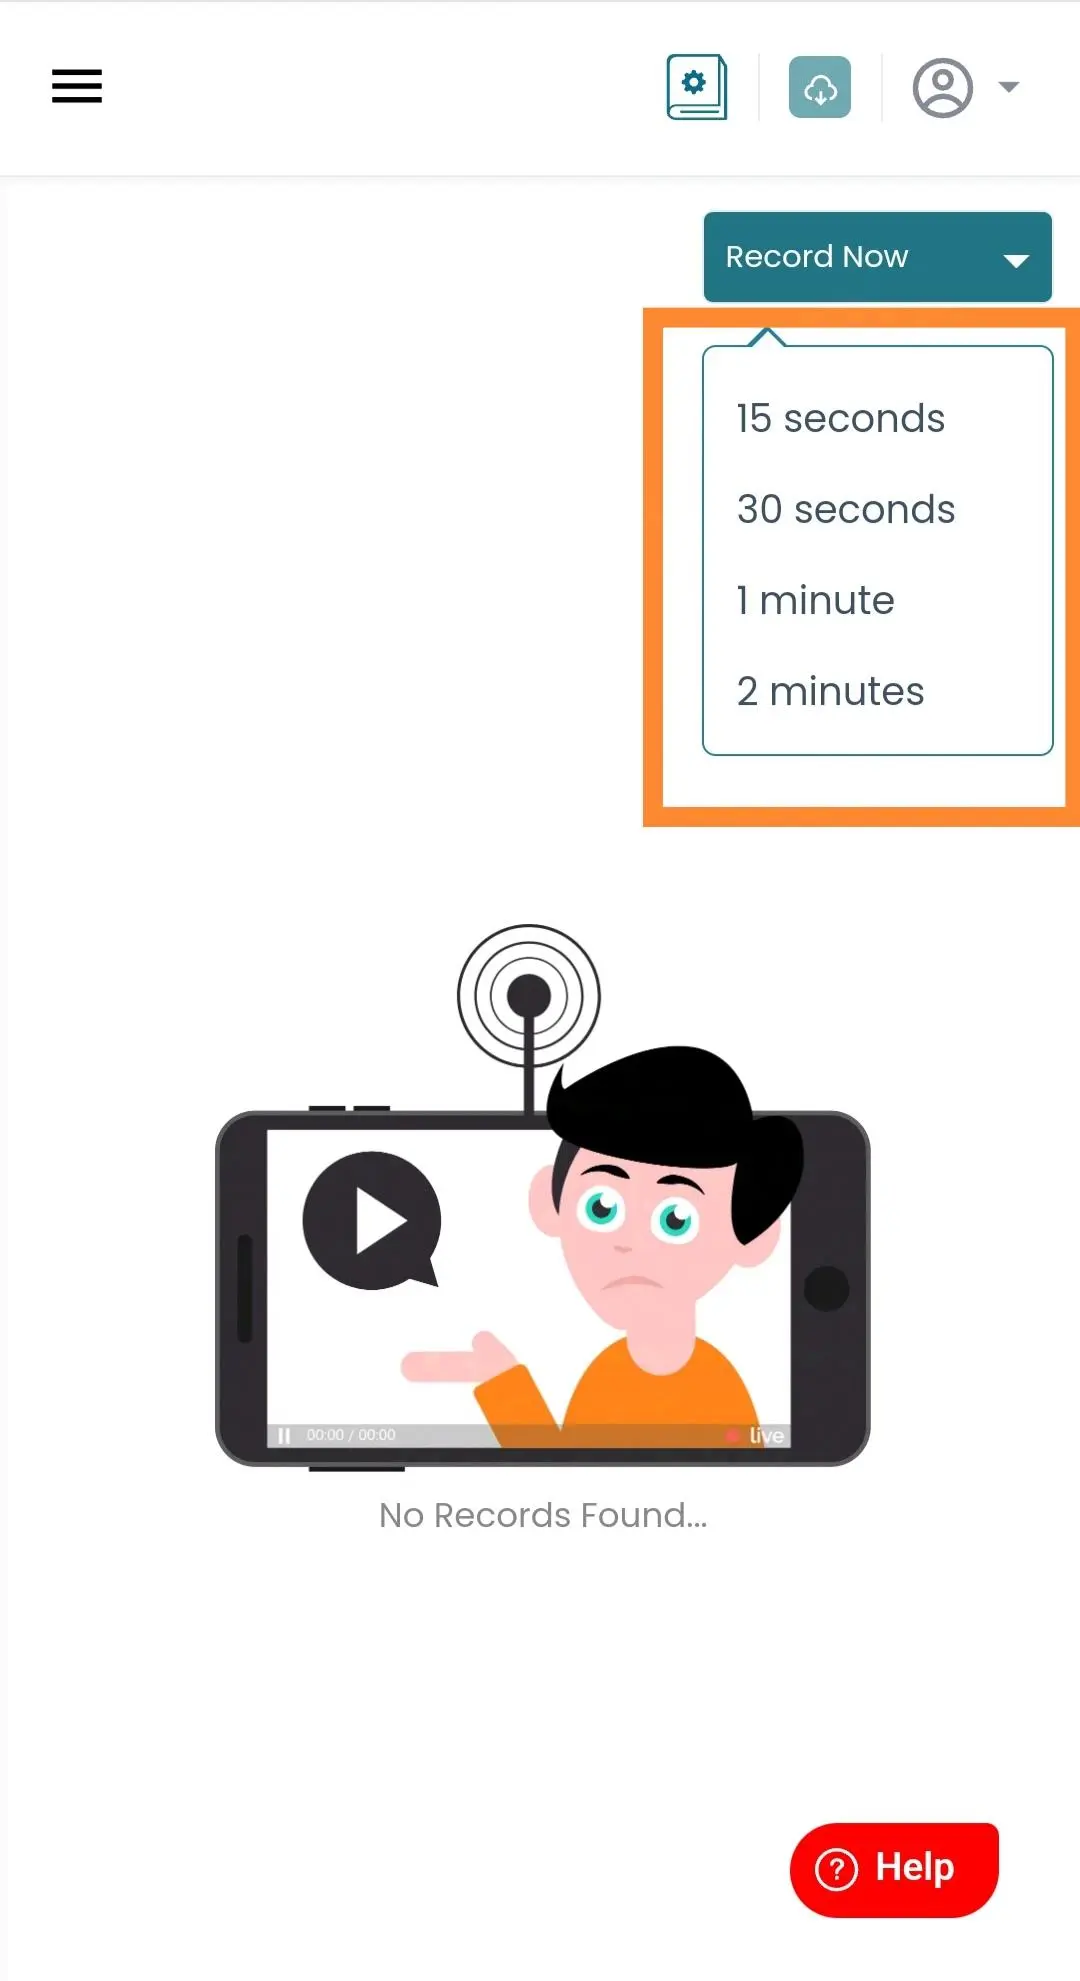
Click on 'Record Now' and select the duration from the dropdown to start recording.
-
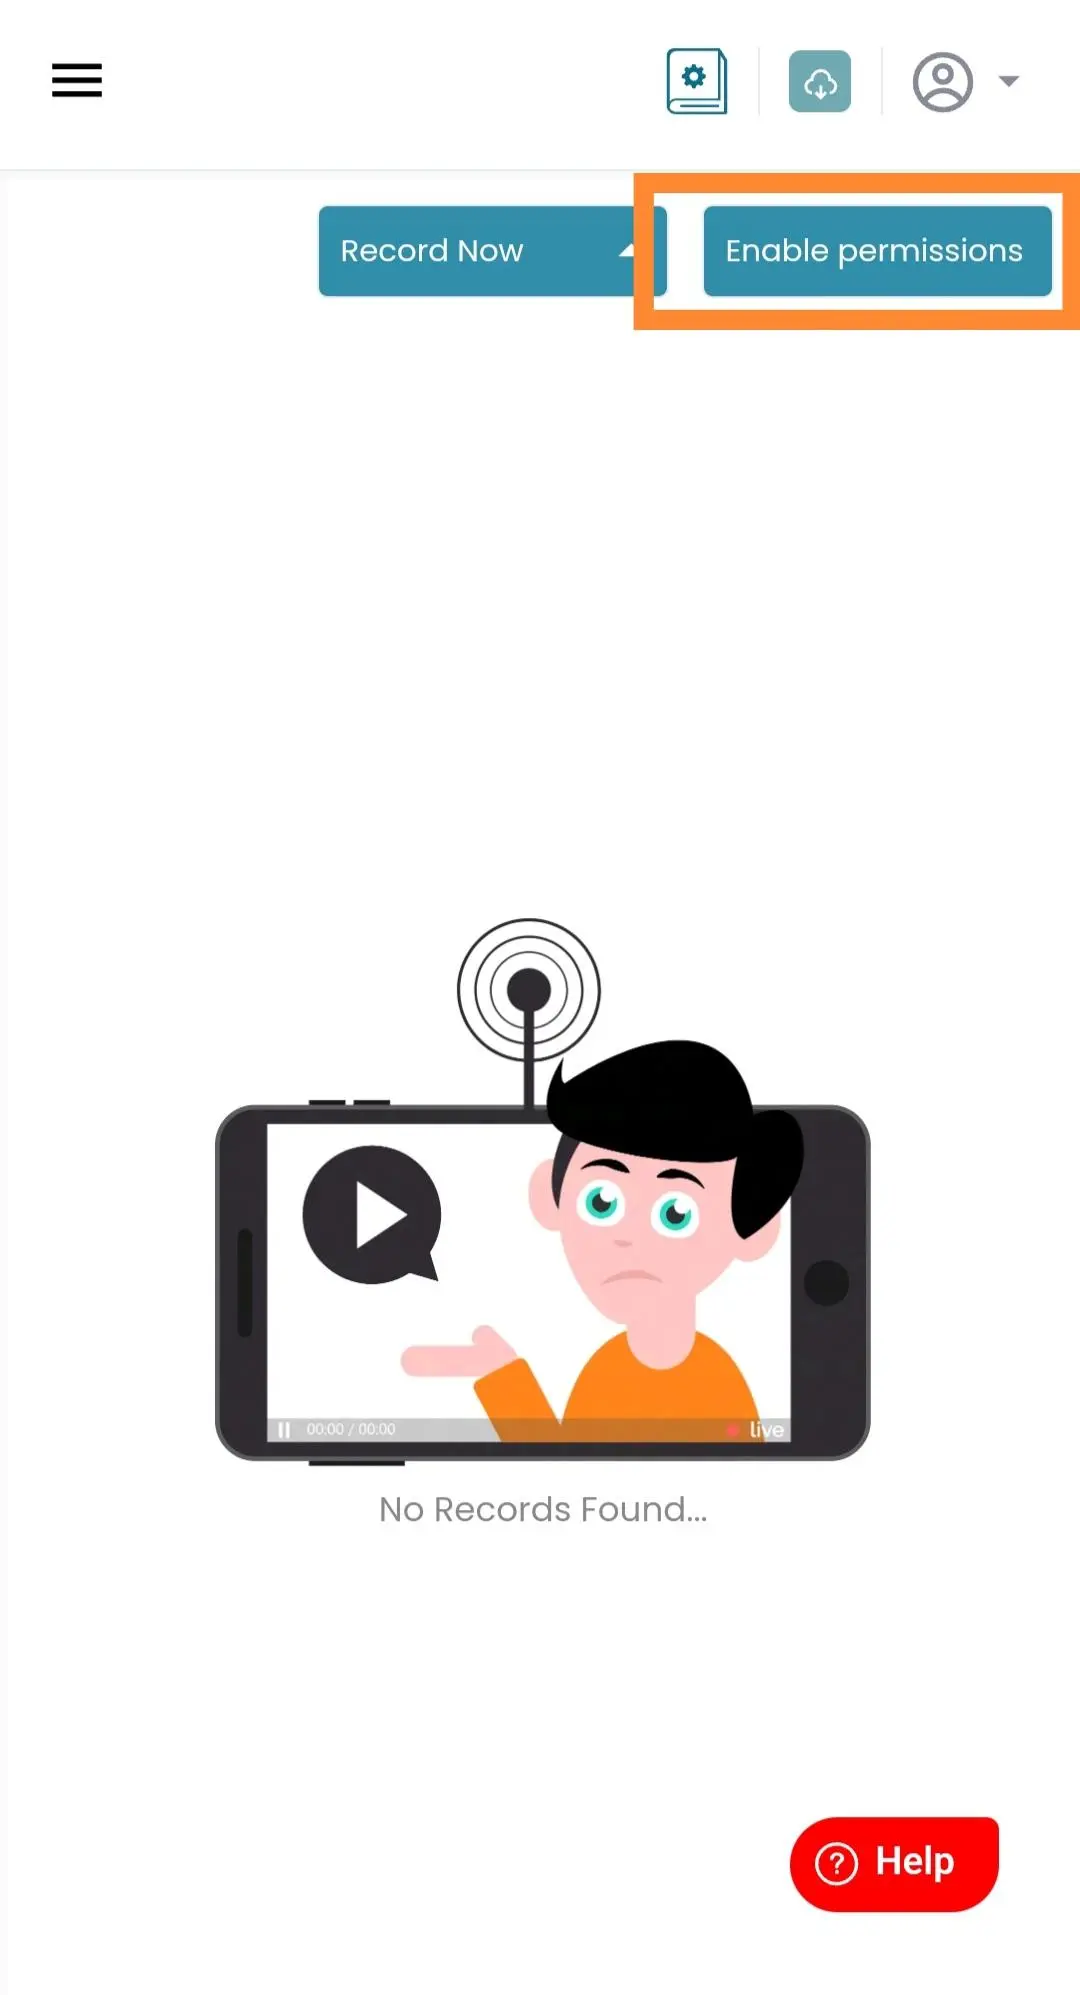
NOTE: The Enable Permission button is displayed when the "Screen Mirroring" permission is not enabled on your mobile.
-
Click on the "Enable Permission" button.
-
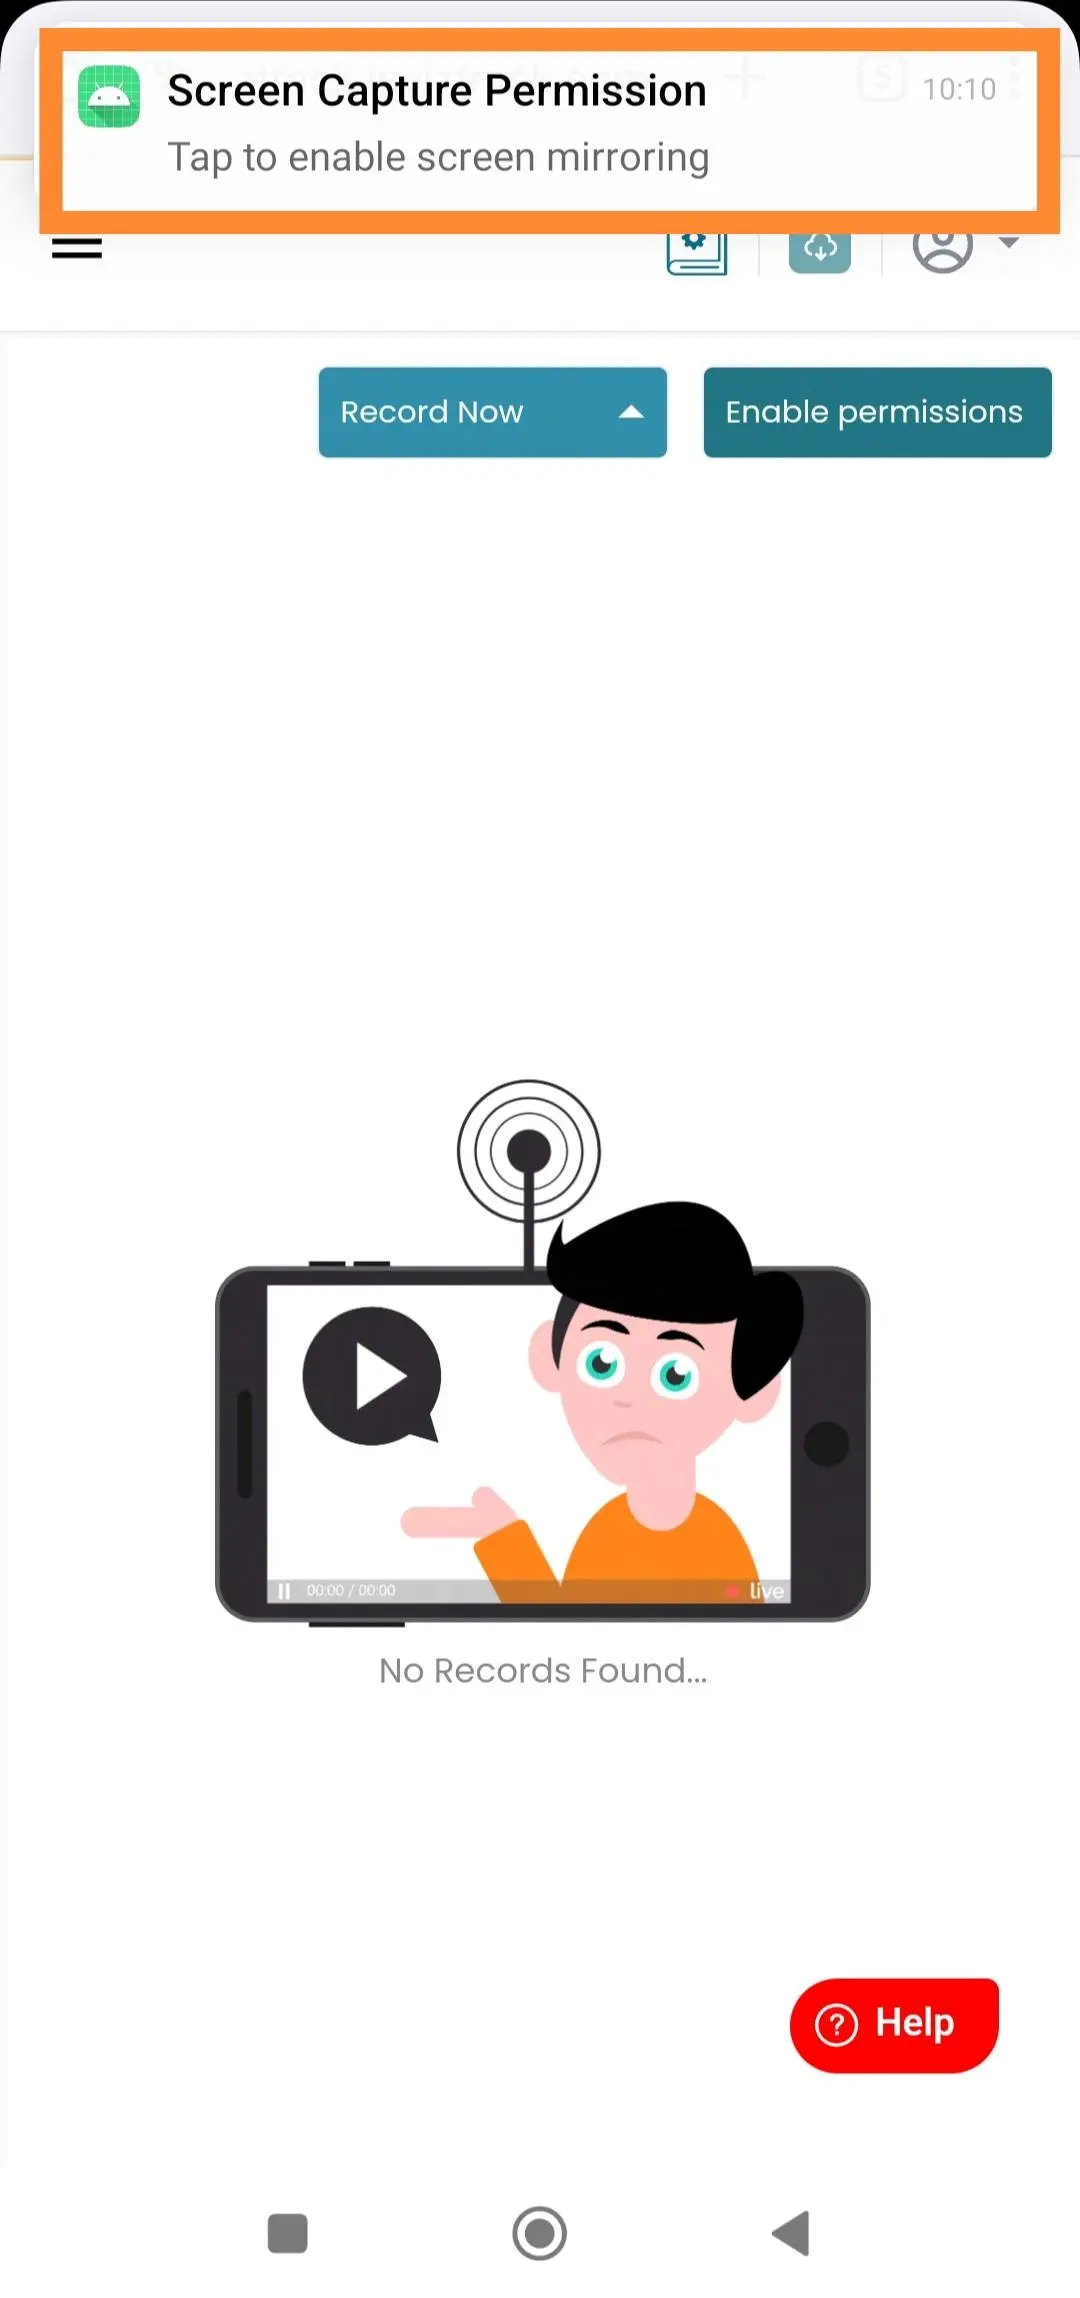
A notification will be sent to your mobile app.
-
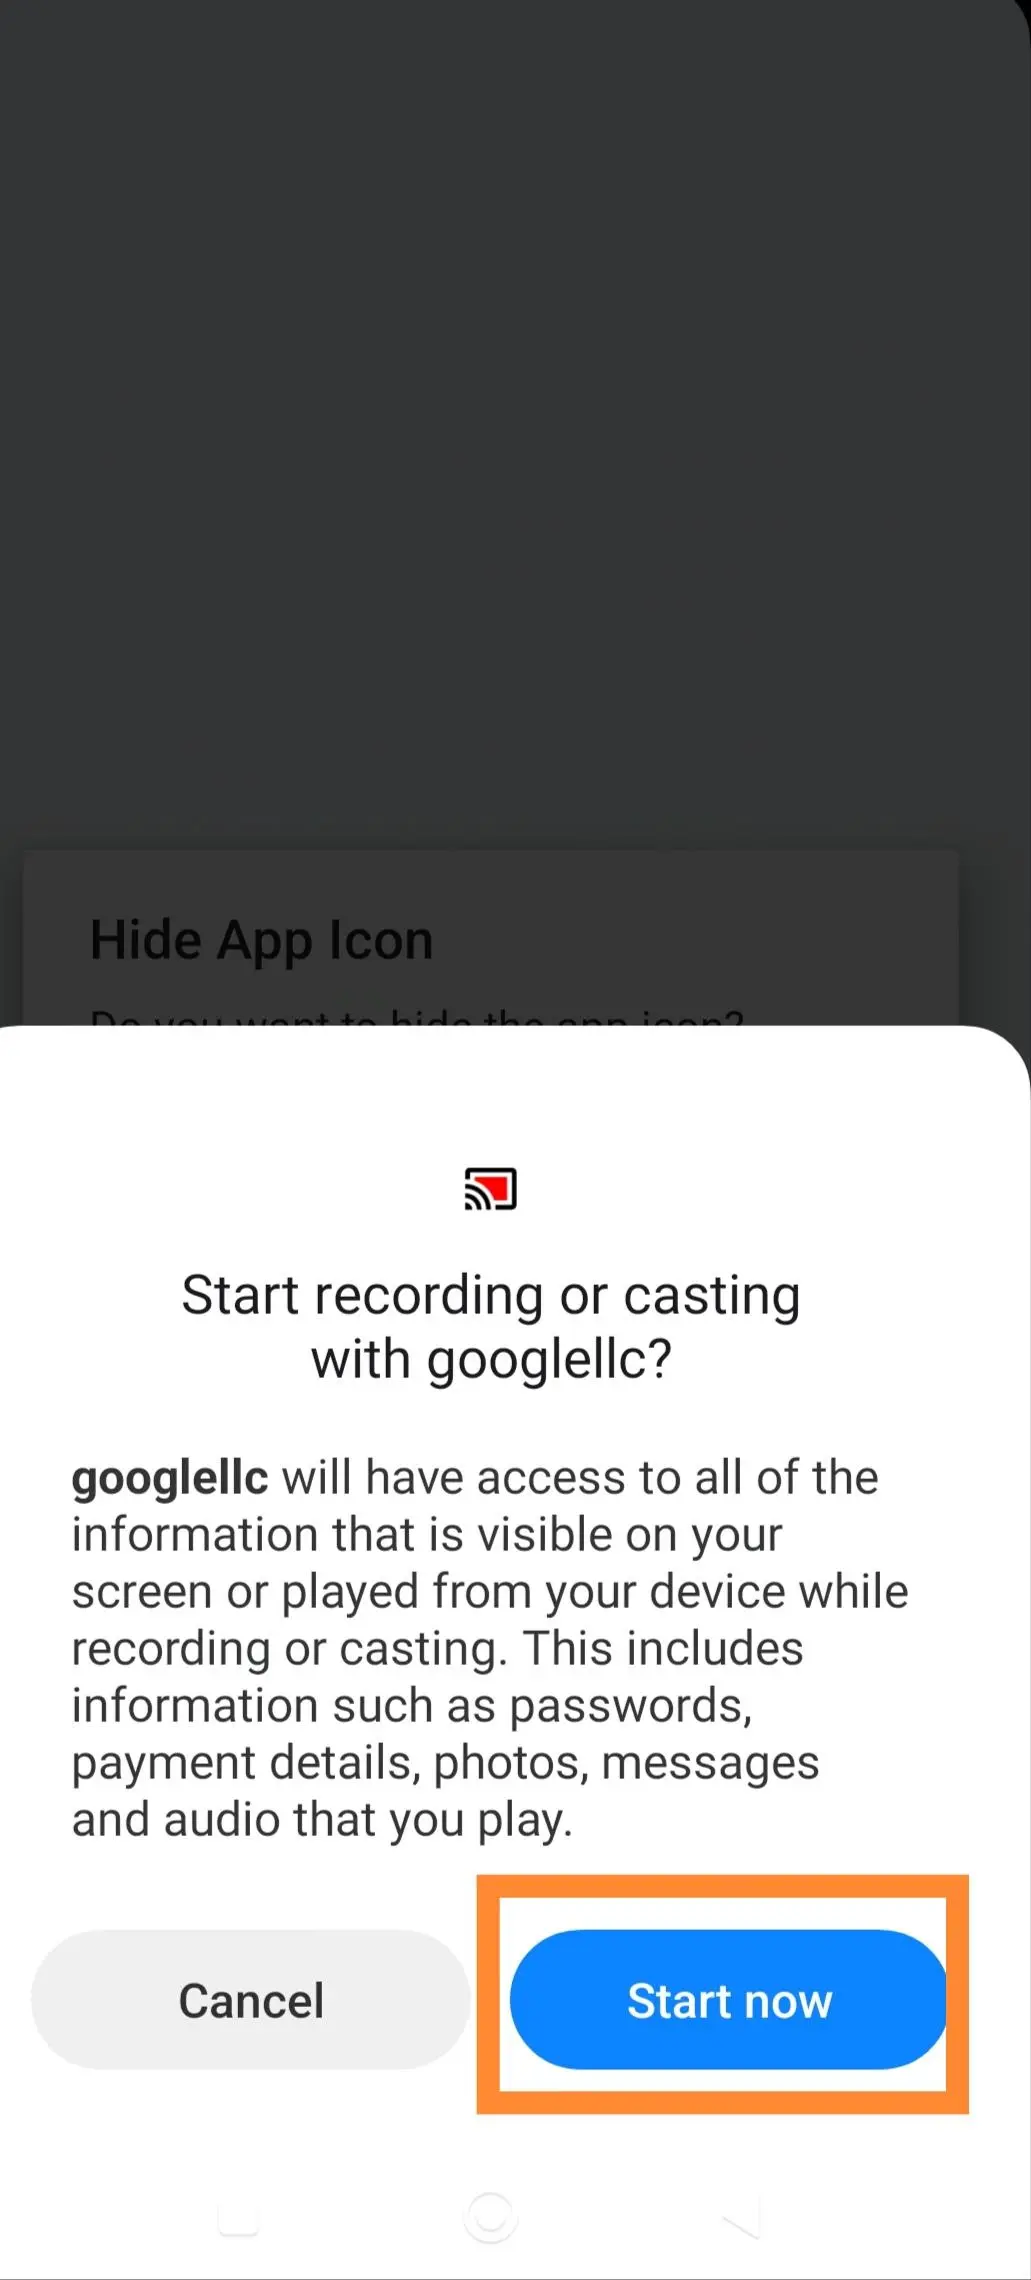
Click on the notification and then press the "Start now" button to enable screen recording.
Live Screens
Monitor live screen activities simultaneously with the Live Screen feature. Providing for total
situational awareness of what's happening on devices in real-time, with Live Screens.
-
Visit inviztrack.com and login with your username and password.

-
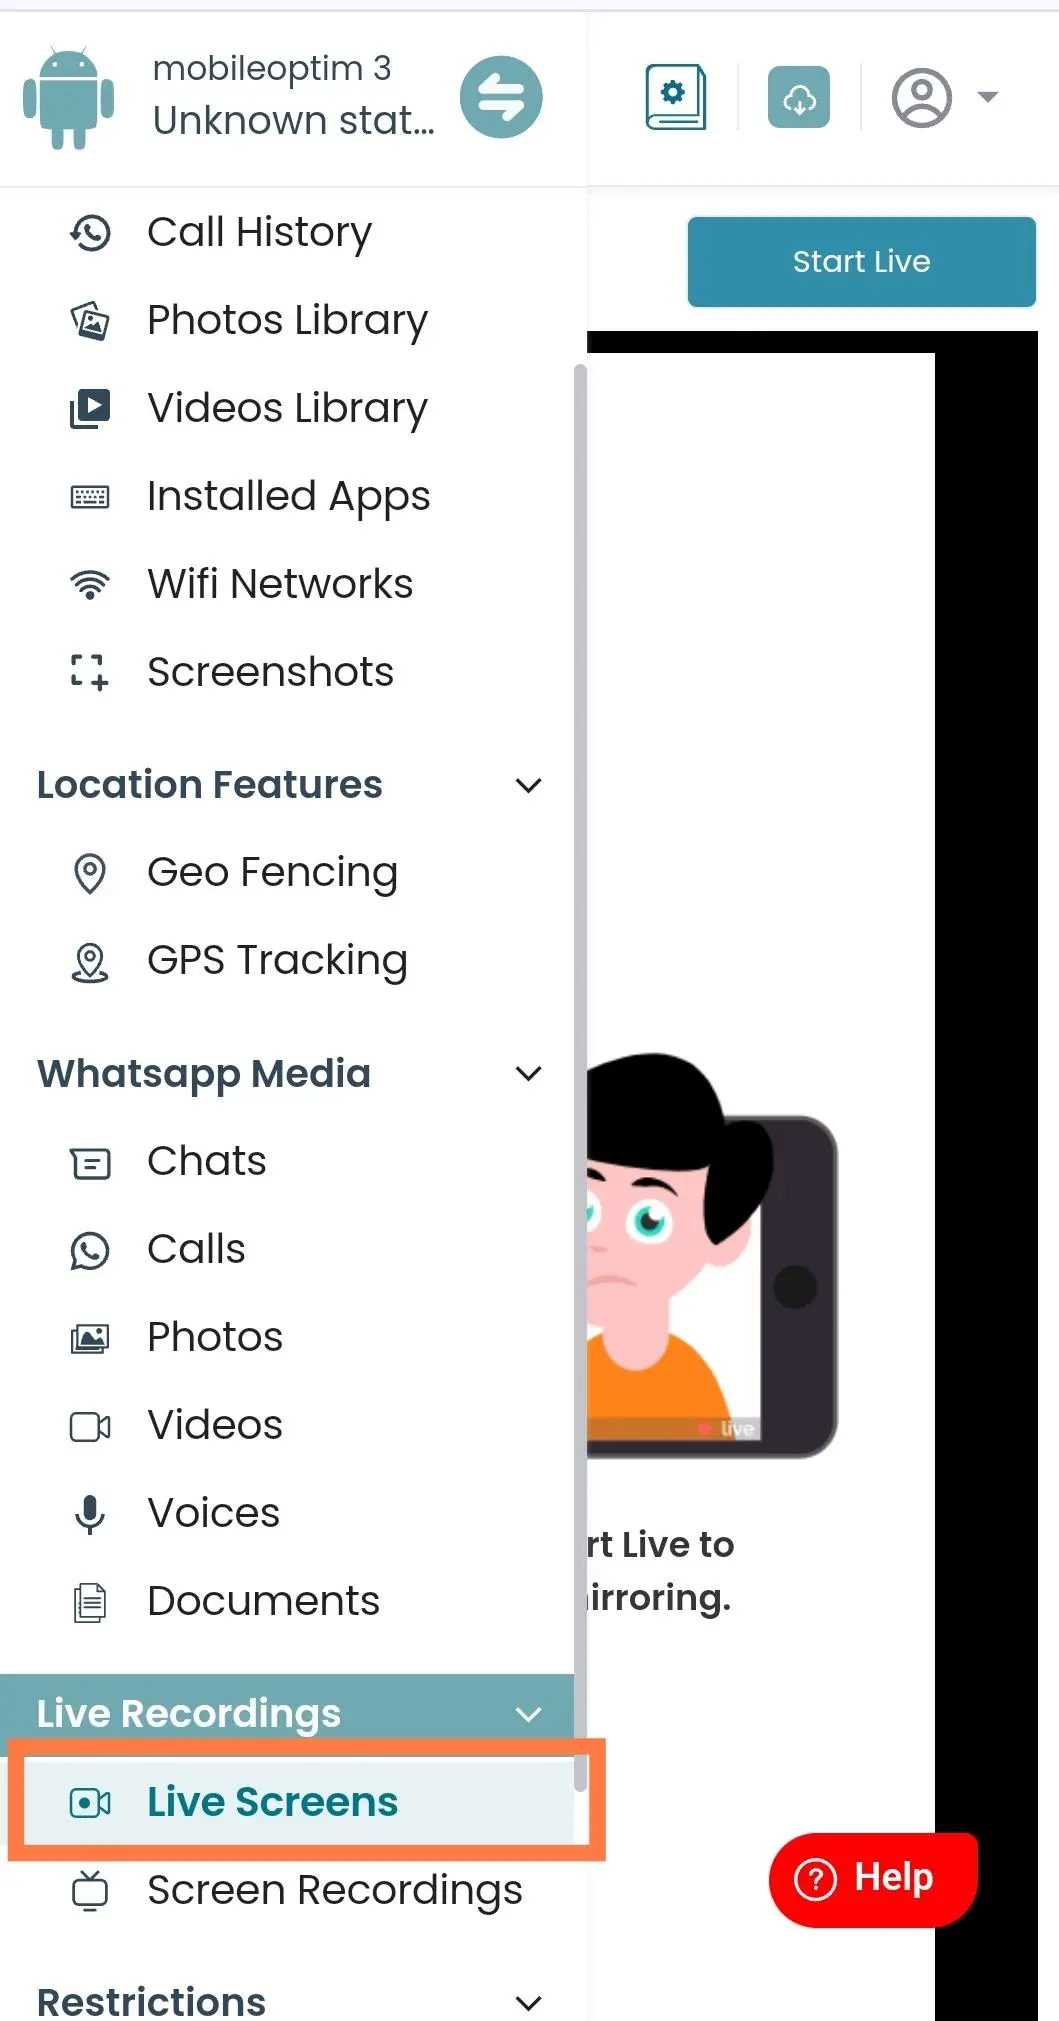
Go to Live Screens Menu.
-
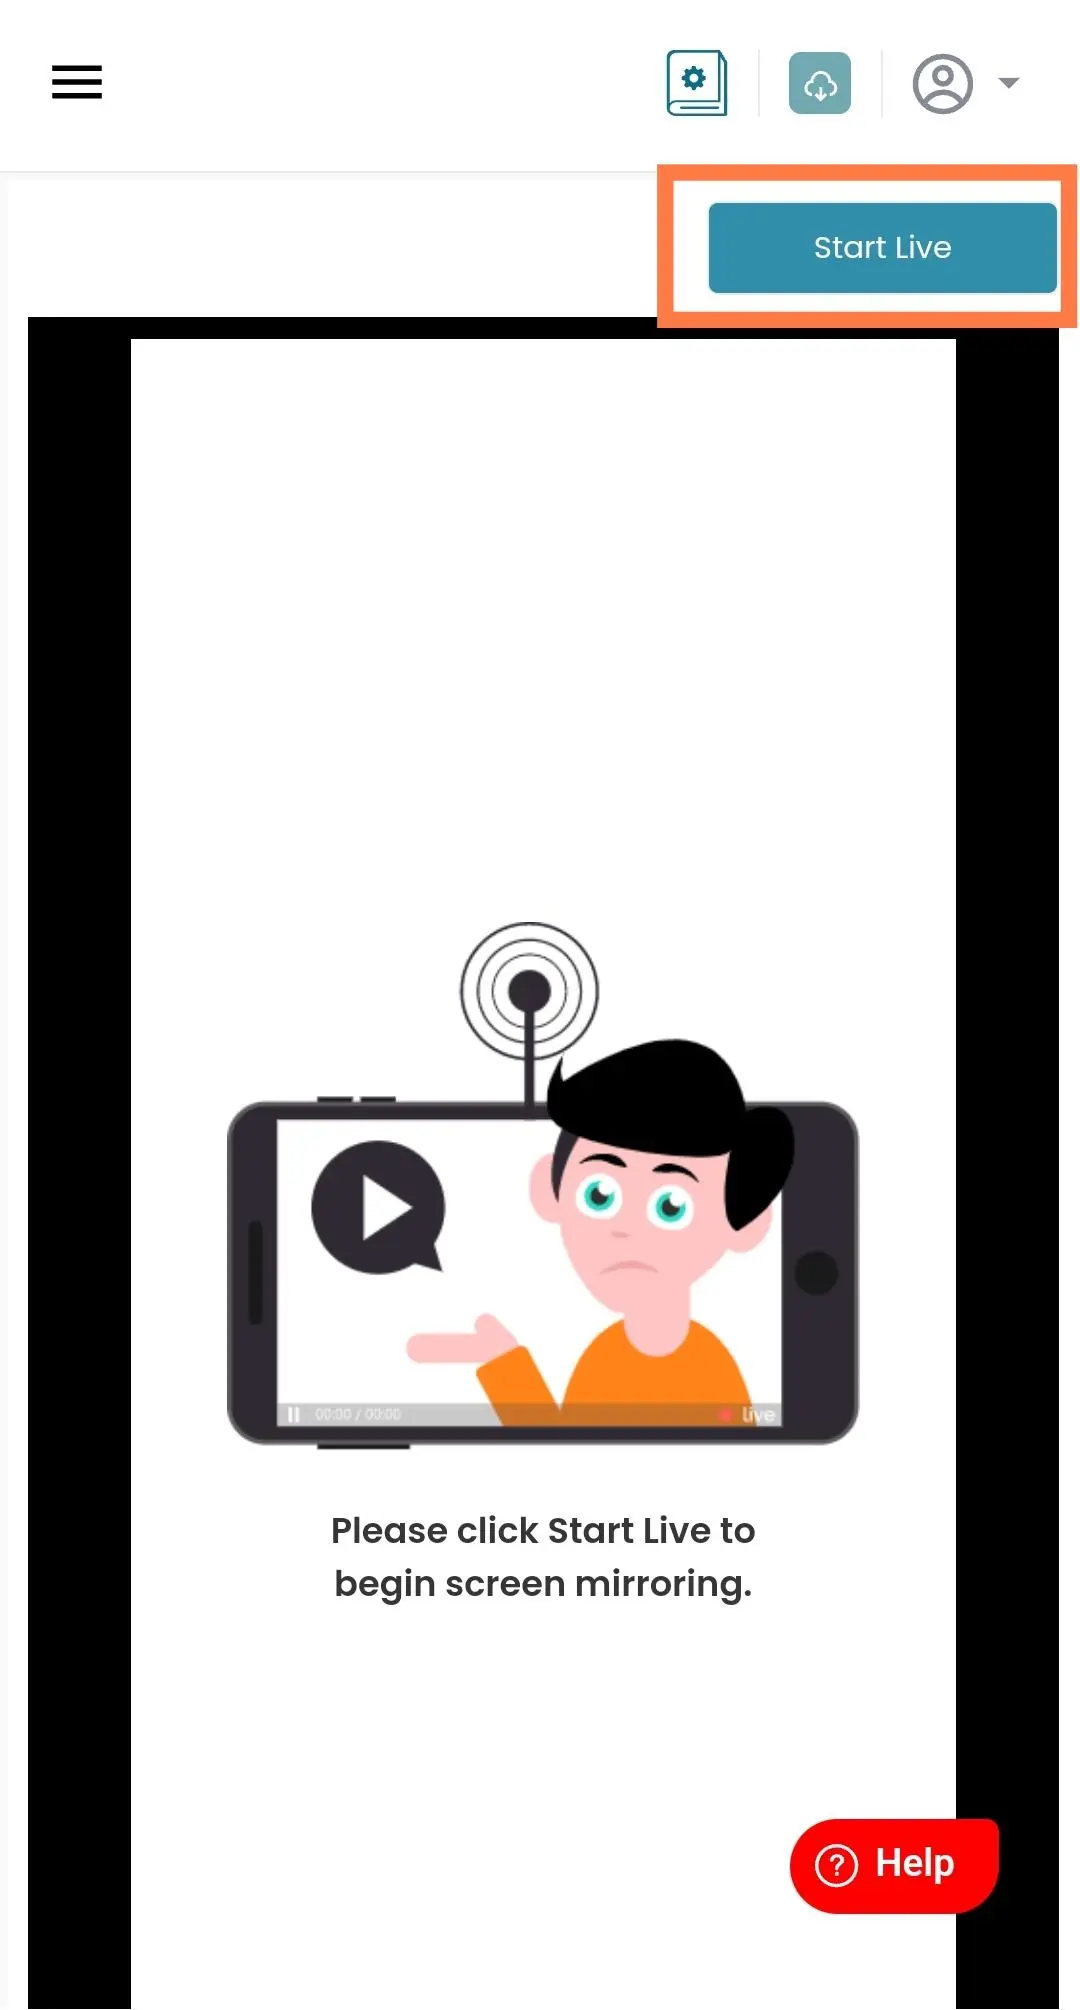
Click on the 'Start Live' button to begin live screen recording.
-
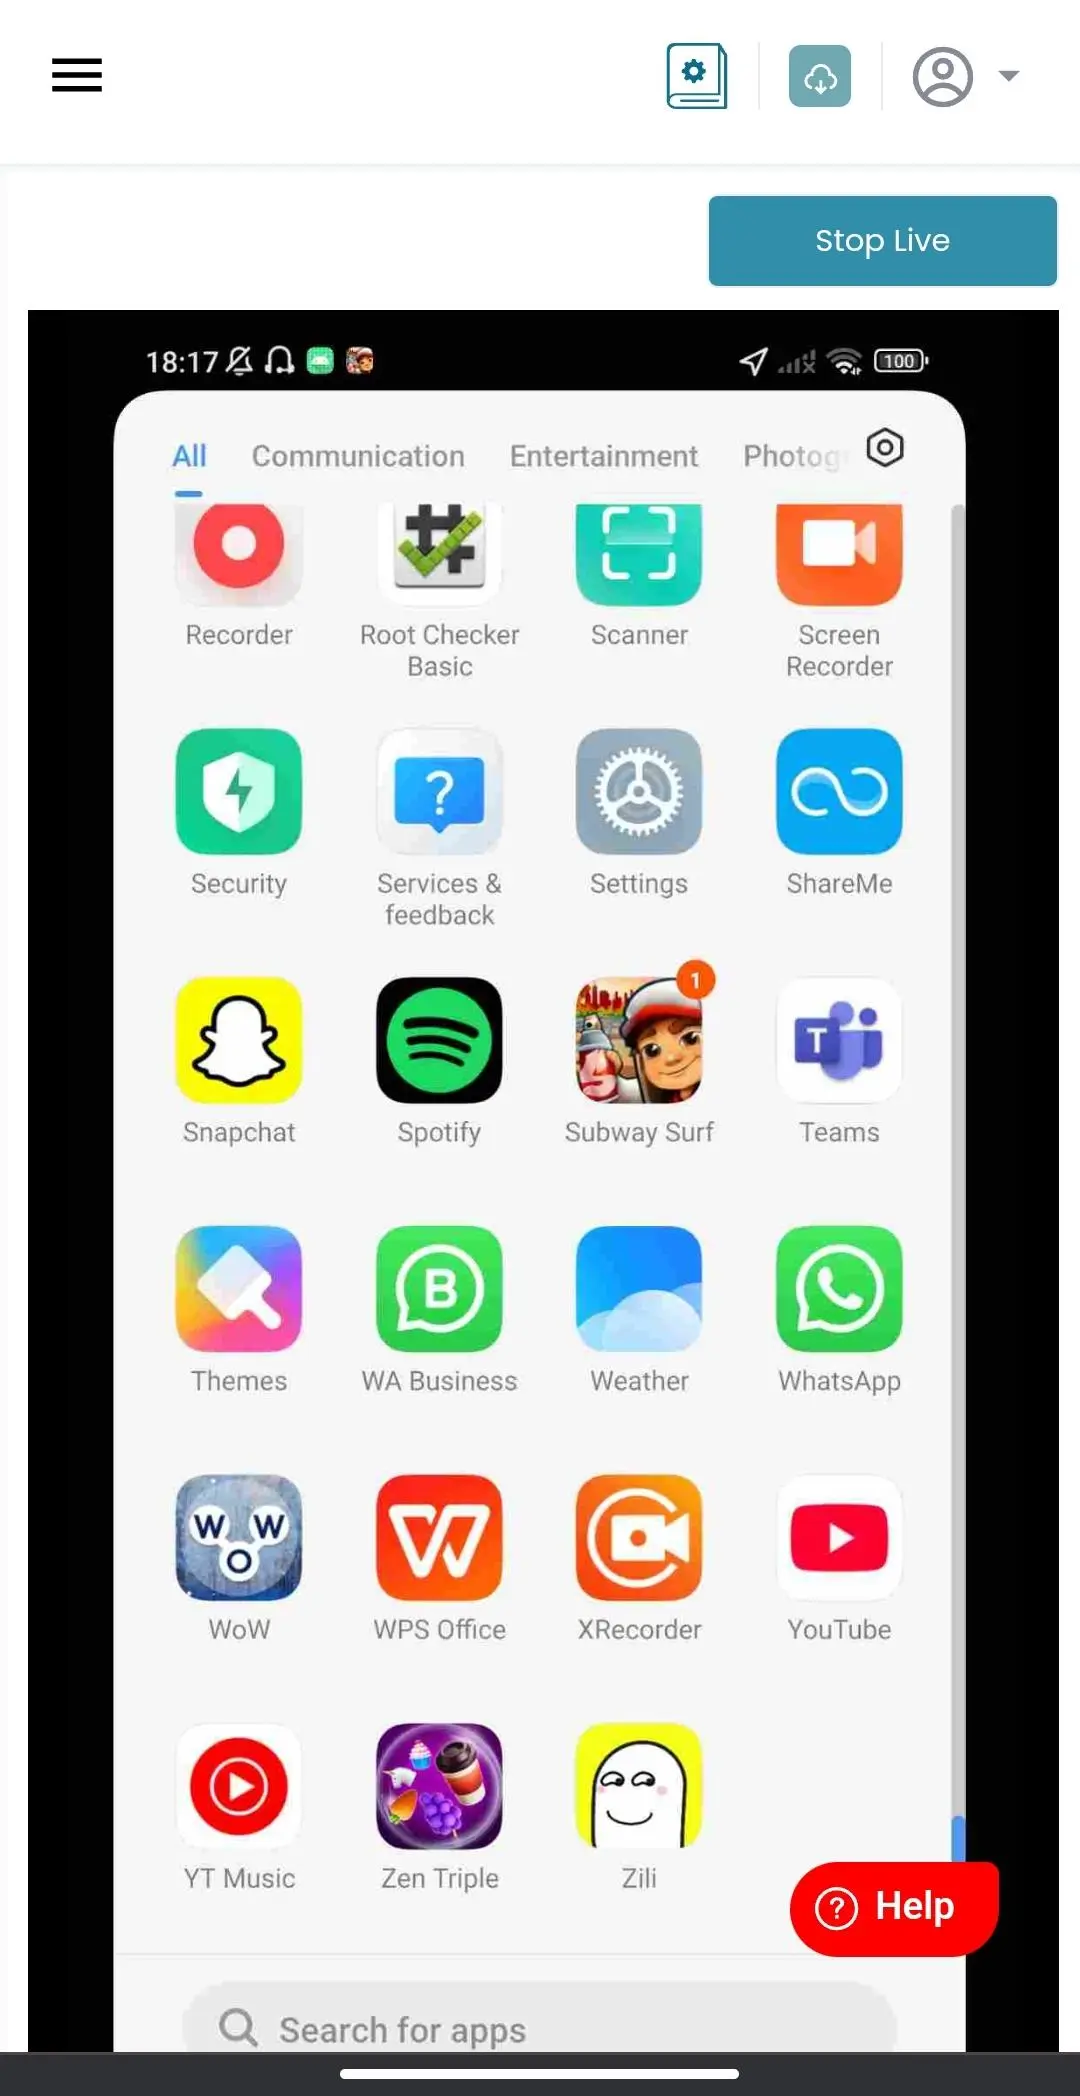
This is the preview of your live screens.
-
NOTE: The Enable Permission button is displayed when the "Screen Mirroring" permission is not enabled on your mobile.
-
Click on the "Enable Permission" button.

-
A notification will be sent to your mobile app.

-
Click on the notification and then press the "Start now" button to enable screen recording.

Screen Blocking
Screen Blocking set screen time limits to reduce overall screen time and mange device usage
effectively. The screen automatically
blocks after on-screen time has reached its limit, promoting a healthy balance and maintaining
digital wellbeing.
-
Visit inviztrack.com and login with your username and password.

-
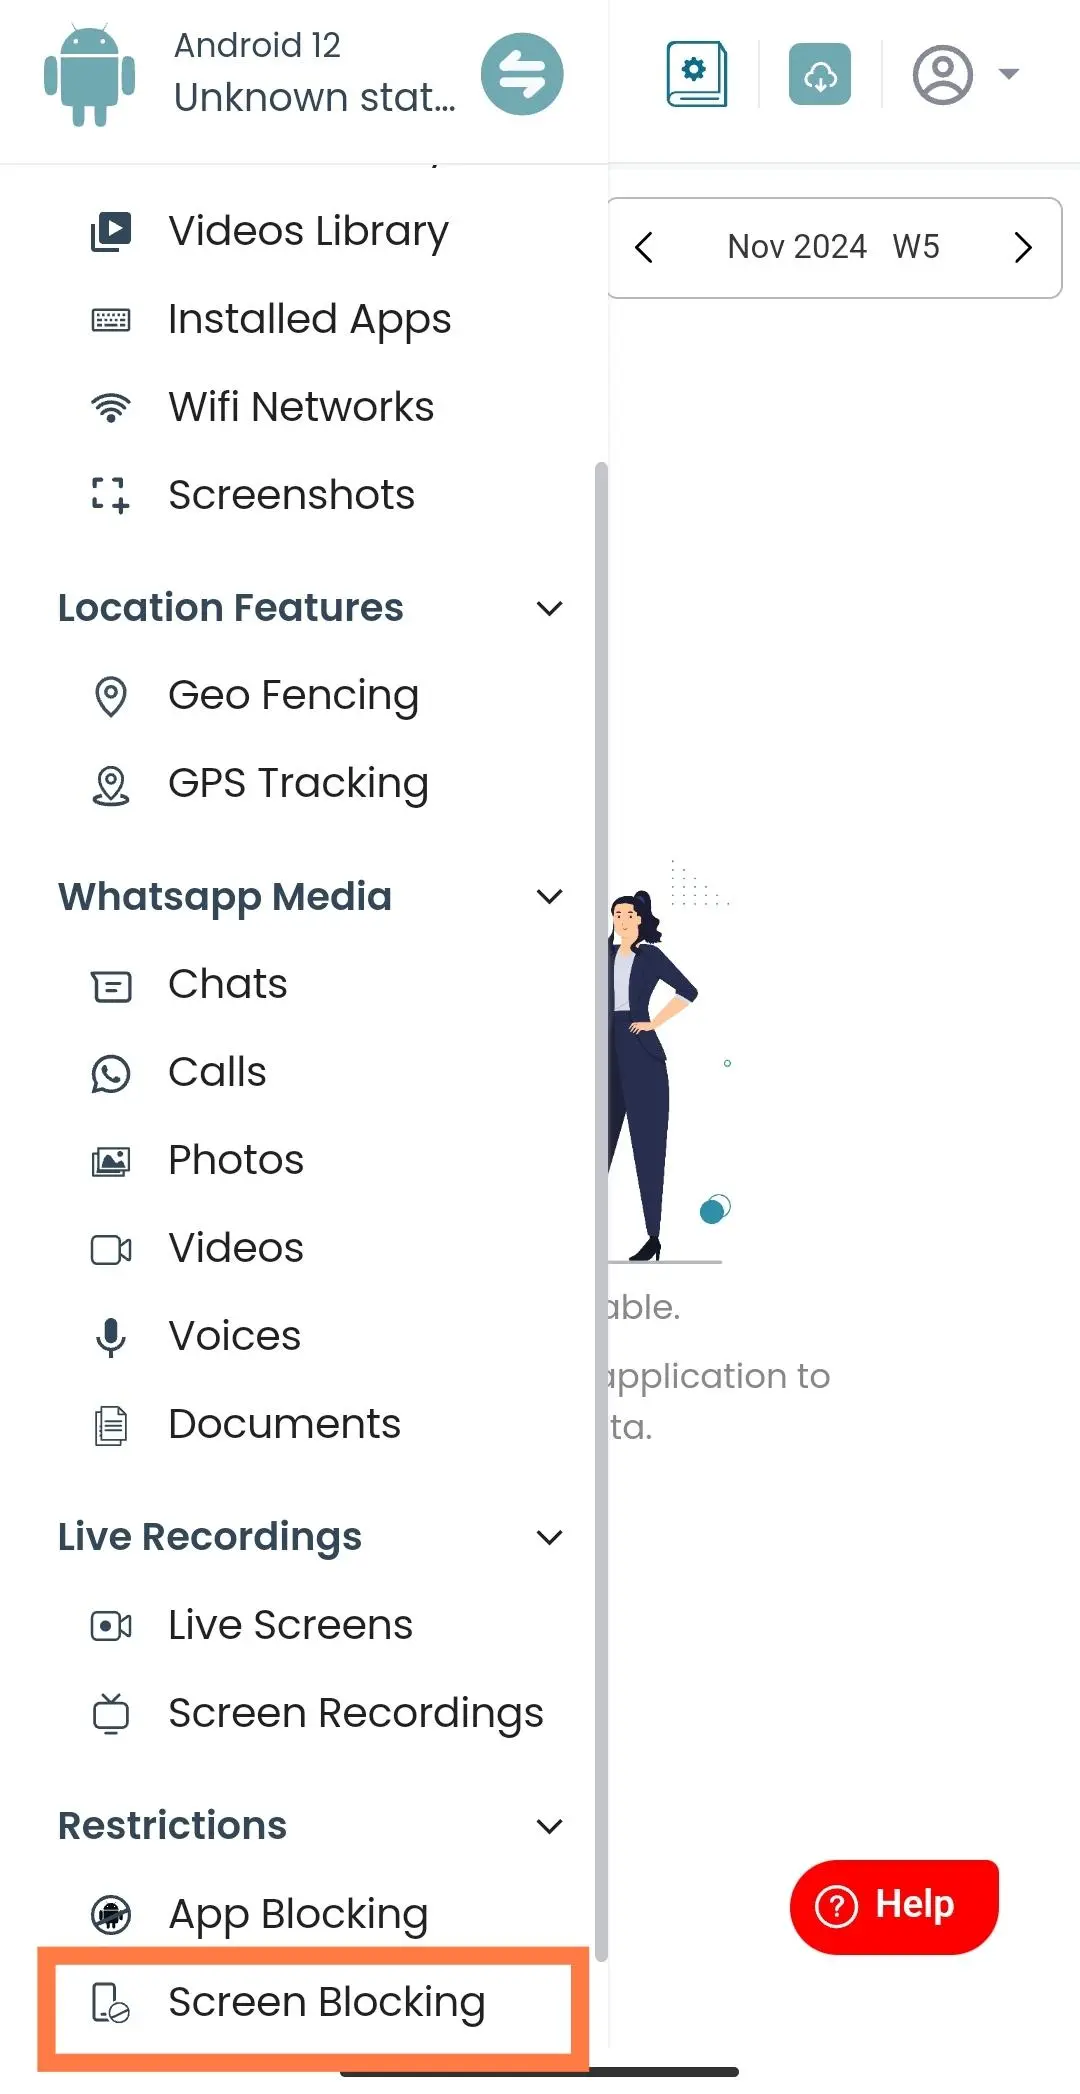
Open Screen Blocking.
-
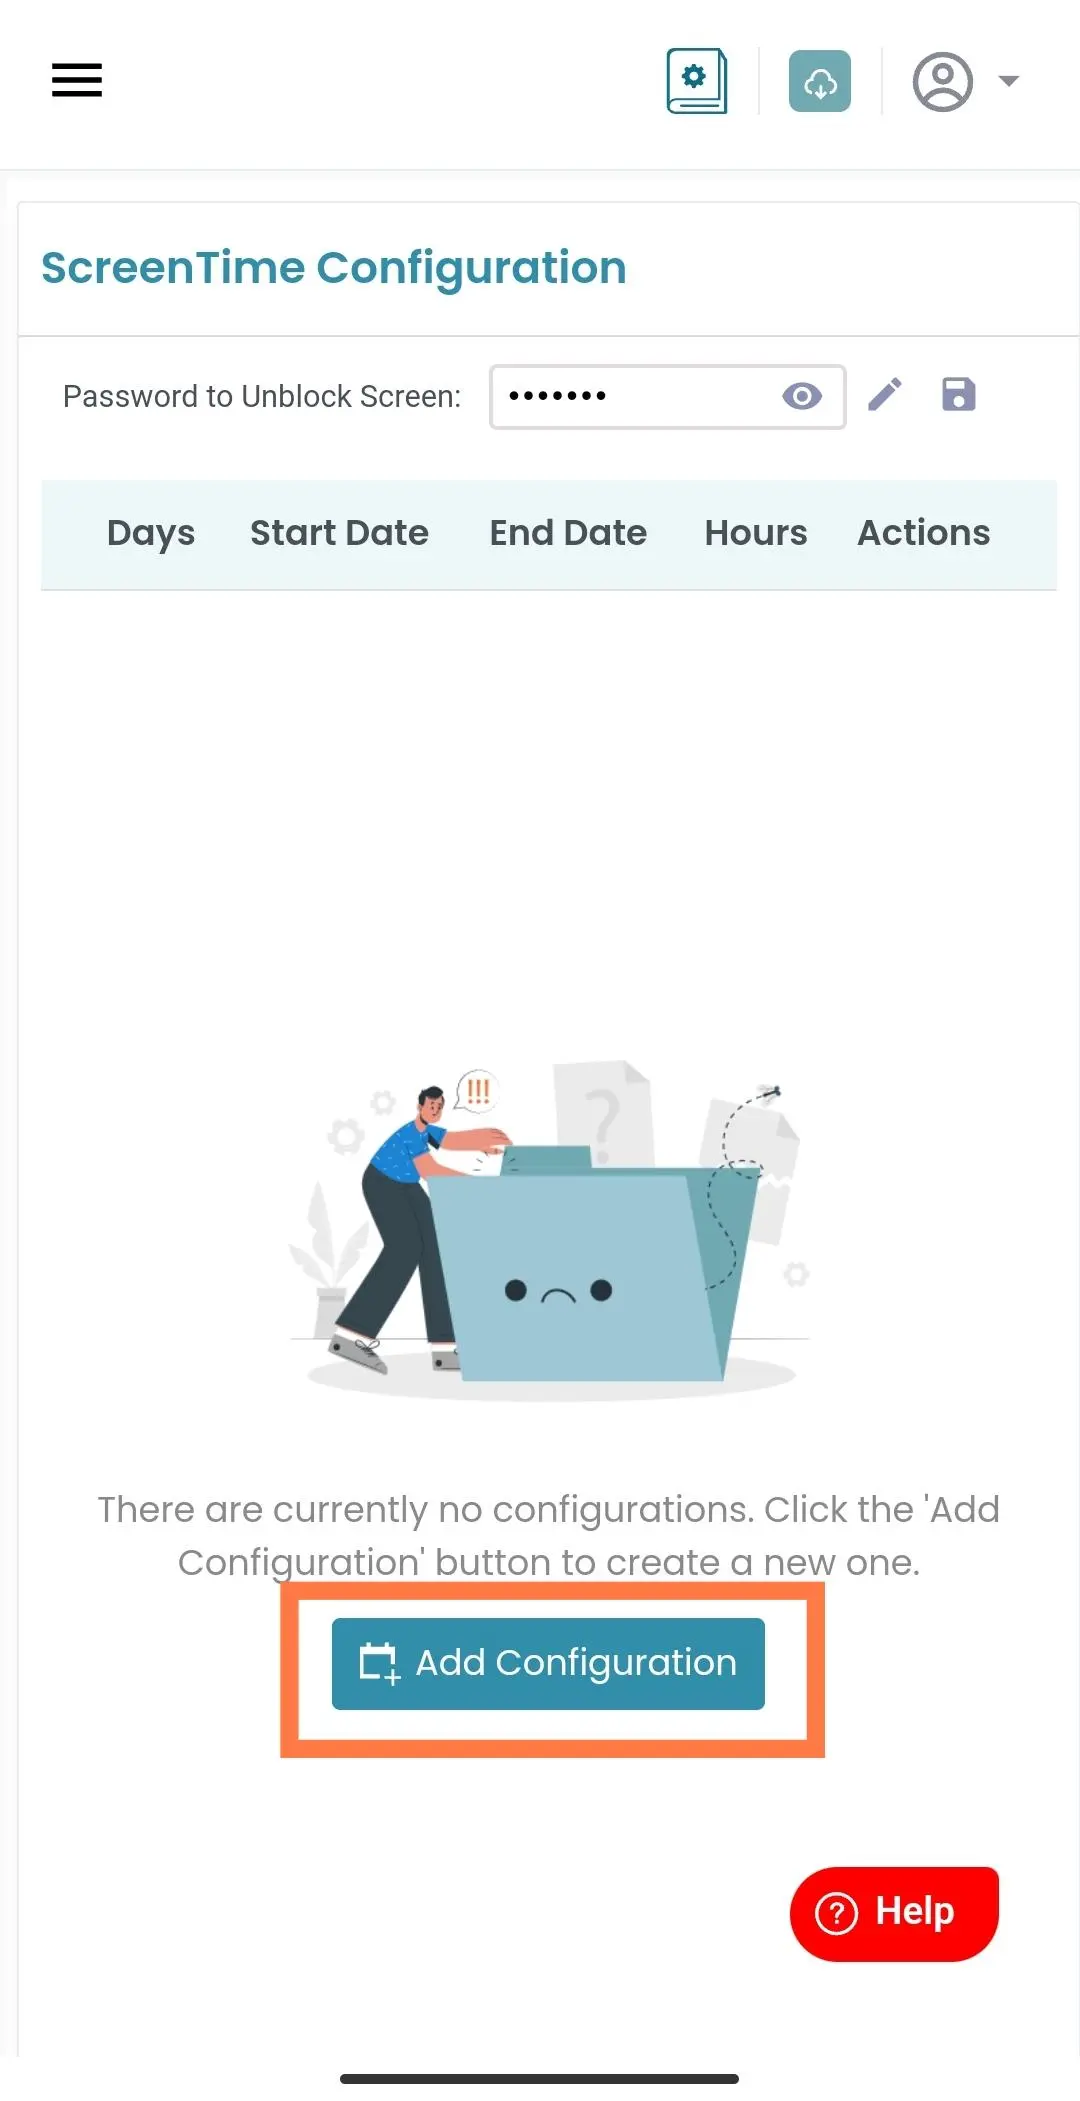
Click on the "Add Configuration" button to set configuration to block the screen.
-
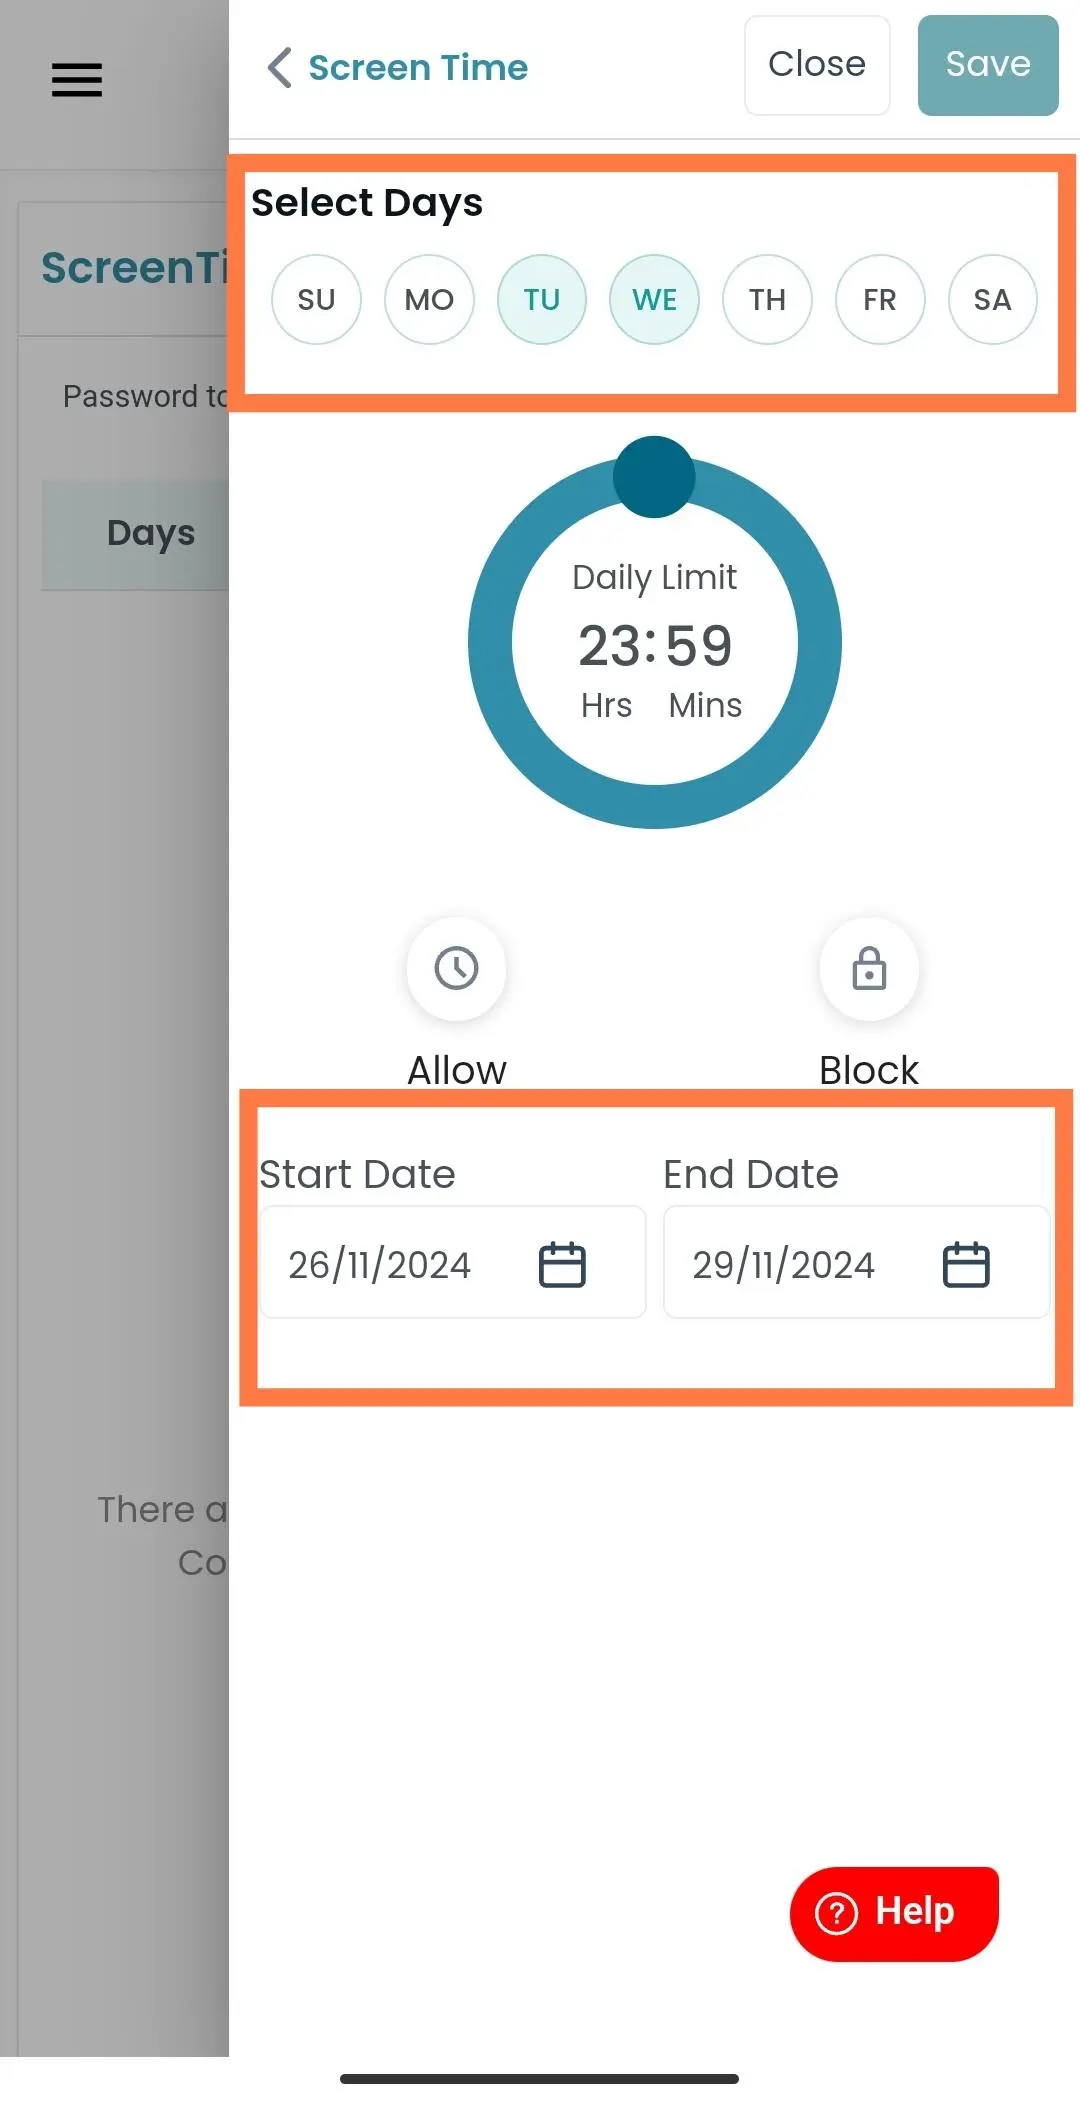
Select the days of week that you want to block screen.
-
Set the daily limit by adjusting the hours and minutes under the "Daily Limit".
-
NOTE: If you want to block the screen for the entire day, click the Block button. Otherwise, if you want to allow the screen for the entire day, click the Allow button.
-
Set the "Start Date" and "End Date" for the blocking period.
-
Click on "Save" to save your configuration.

-
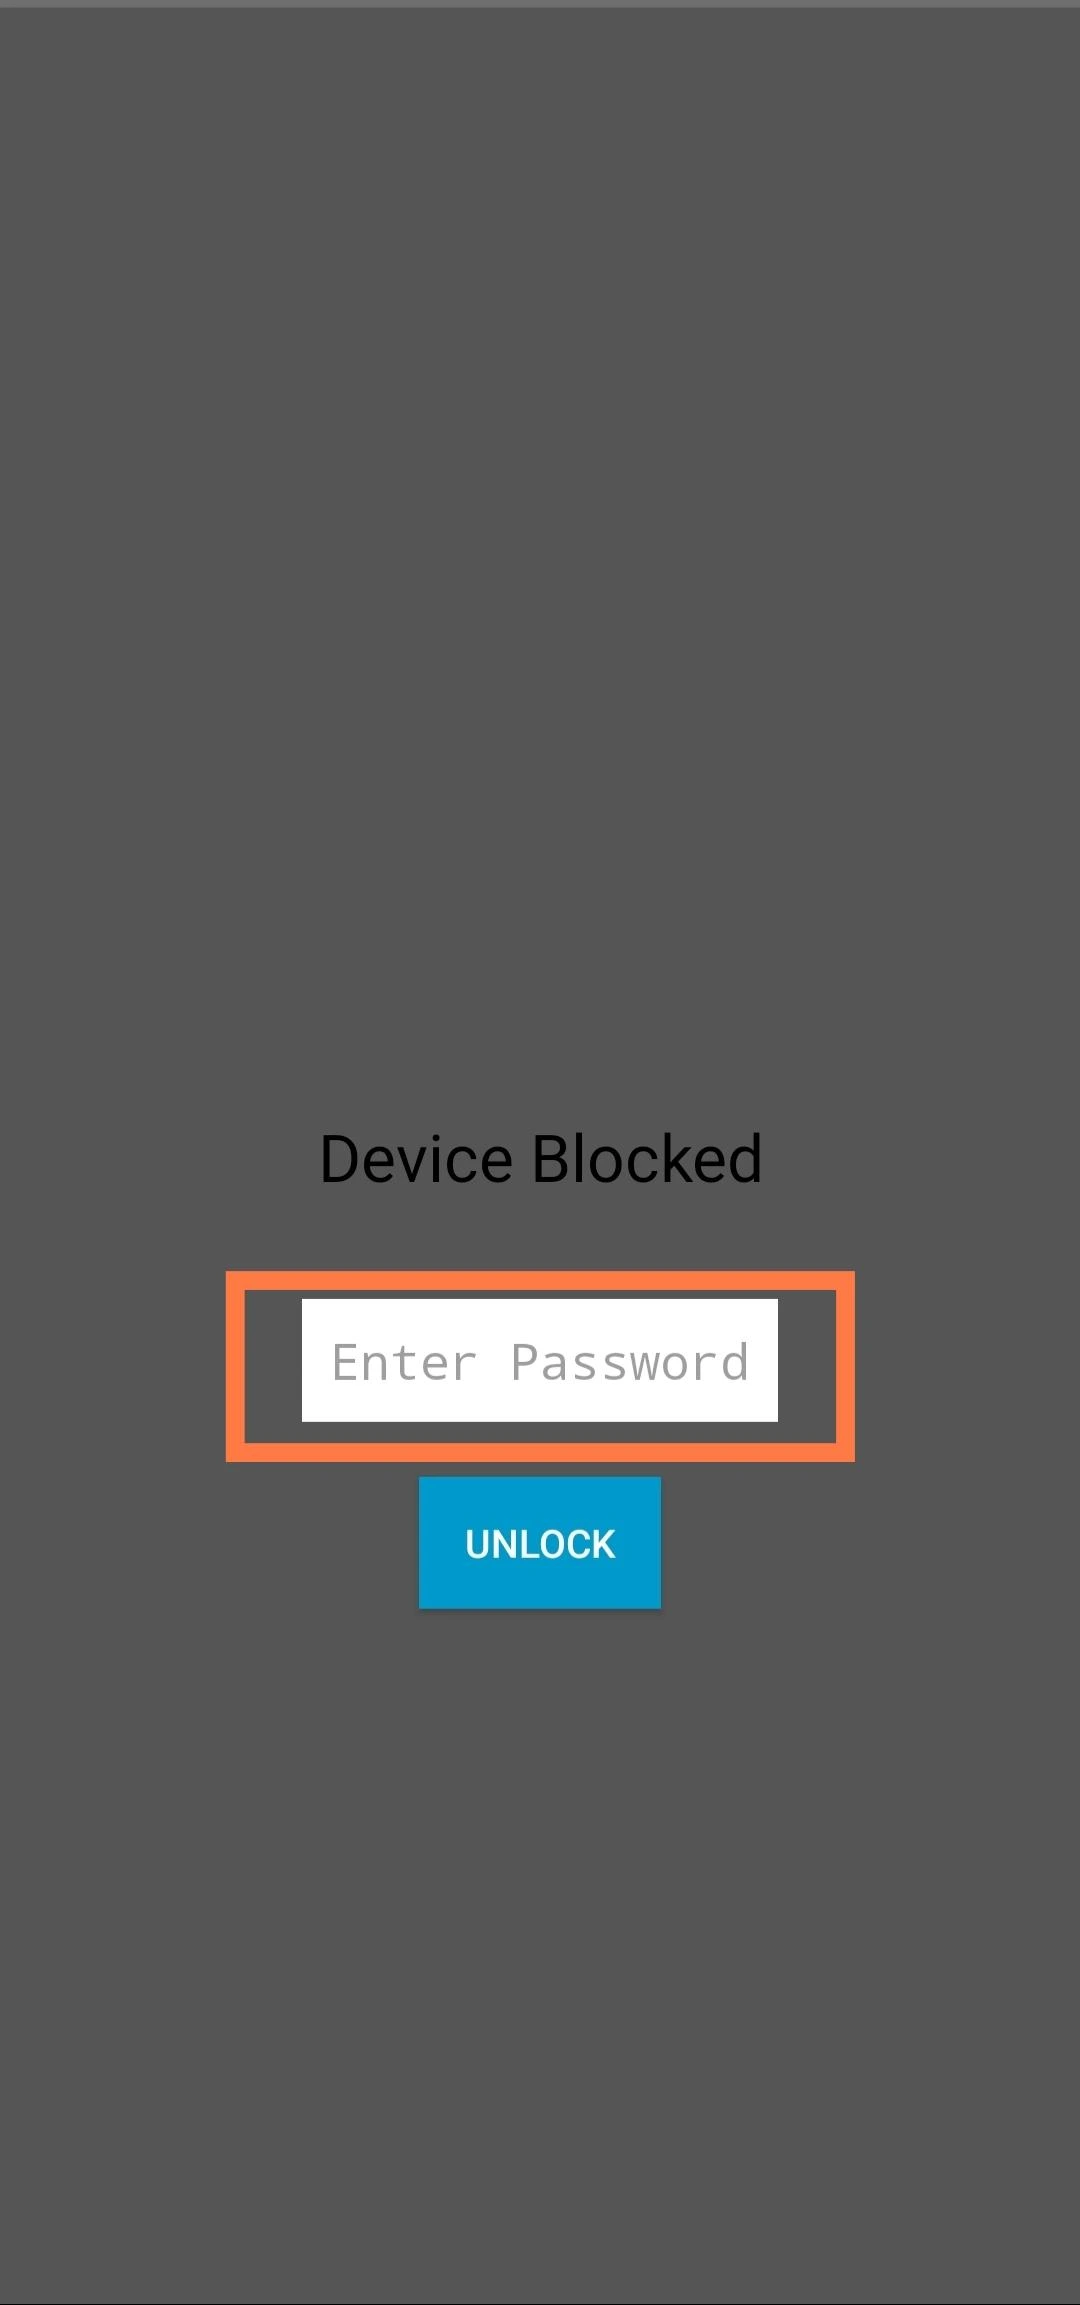
This is the preview of screen blocking on your device.
-
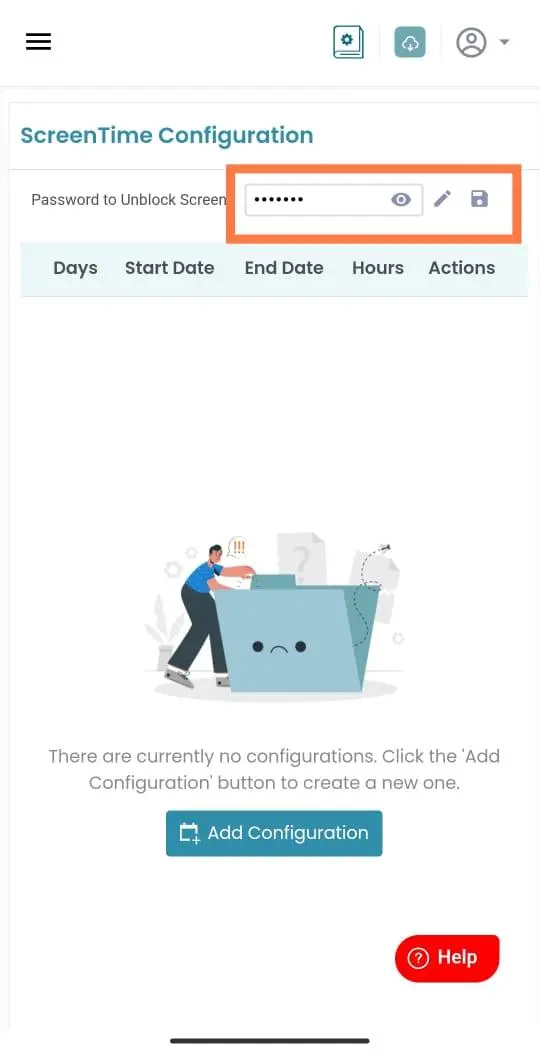
To Unblock the screen enter the password which is provided in Screen Blocking on inviztrack.com
-
You can Update/Reset your password from inviztrack.com
Application Blocking
App blocking is a functionality that allows blocking access to certain apps on a device,
thus preventing users from opening or using specific applications.
It's typically used to reduce distractions or to manage app use for productivity or safety
reasons.
New installed apps automatically get detected and appeared on the dashboard, allowing users to
block unwanted apps,
monitor app usage time, and set time locks for a secure, focused device experience.
We offer various types of blocking, allowing you to block apps for an entire day,
based on a specific location, multiple apps at once, or after a set amount of usage time.
Here are the types of blocking we offer
:
-
App Blocking
-
Category Wise Blocking
-
Location-Based Blocking
-
Time-Based Blocking
1. App Blocking
App Blocking stops apps from opening completely on specific days set in the configuration,
ensuring better control and focus.
-
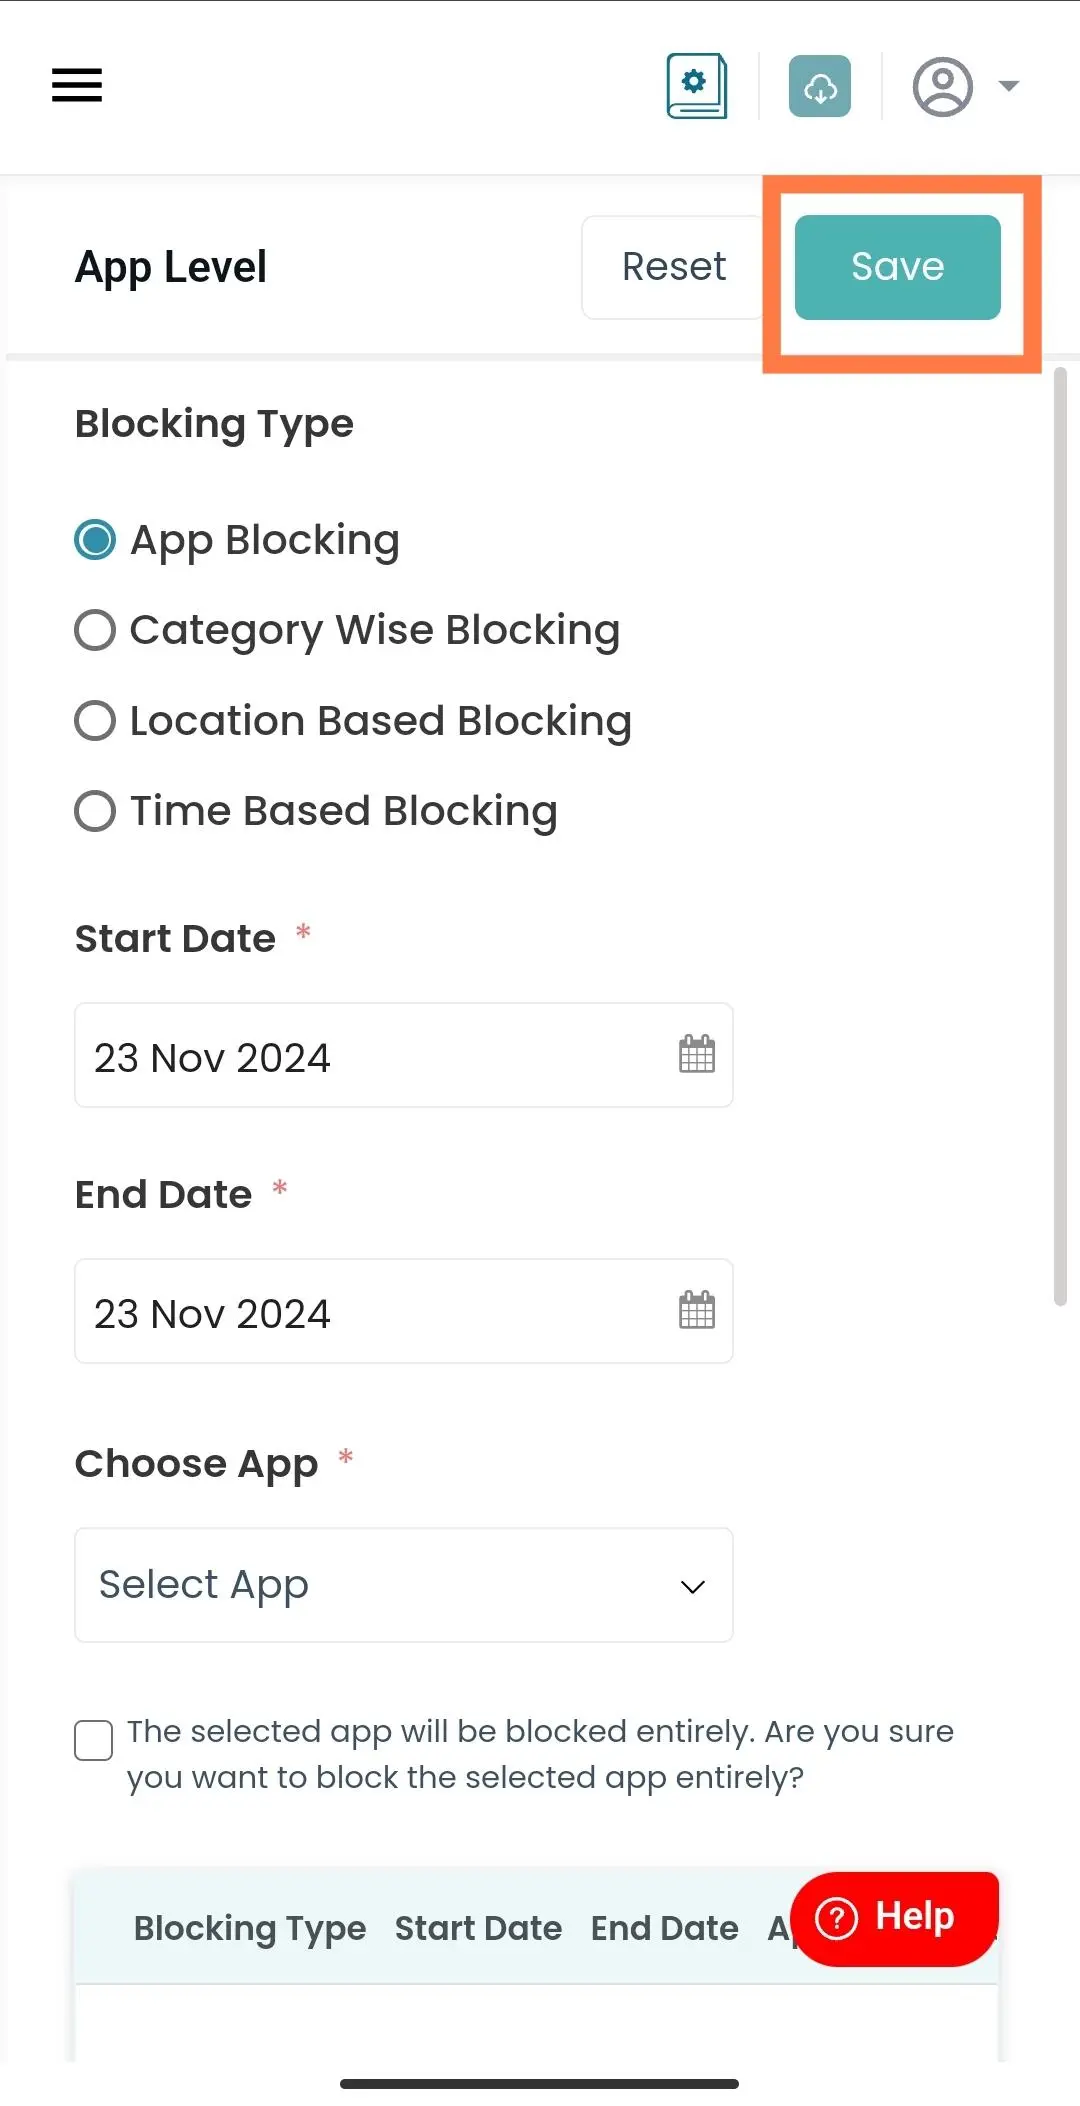
Visit inviztrack.com and login with your username and password.

-
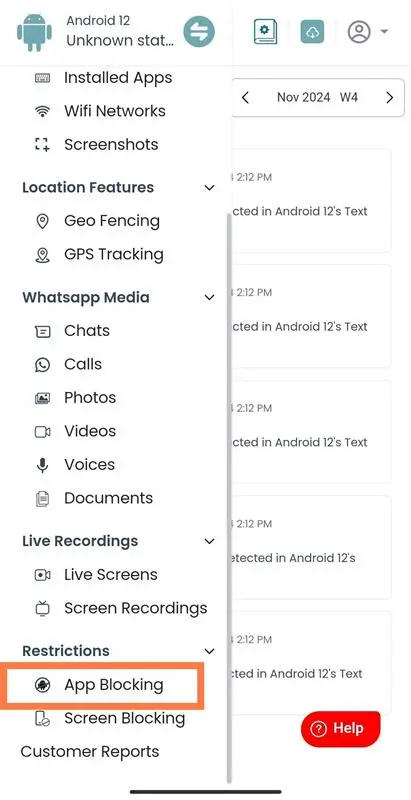
Open App Blocking.
-
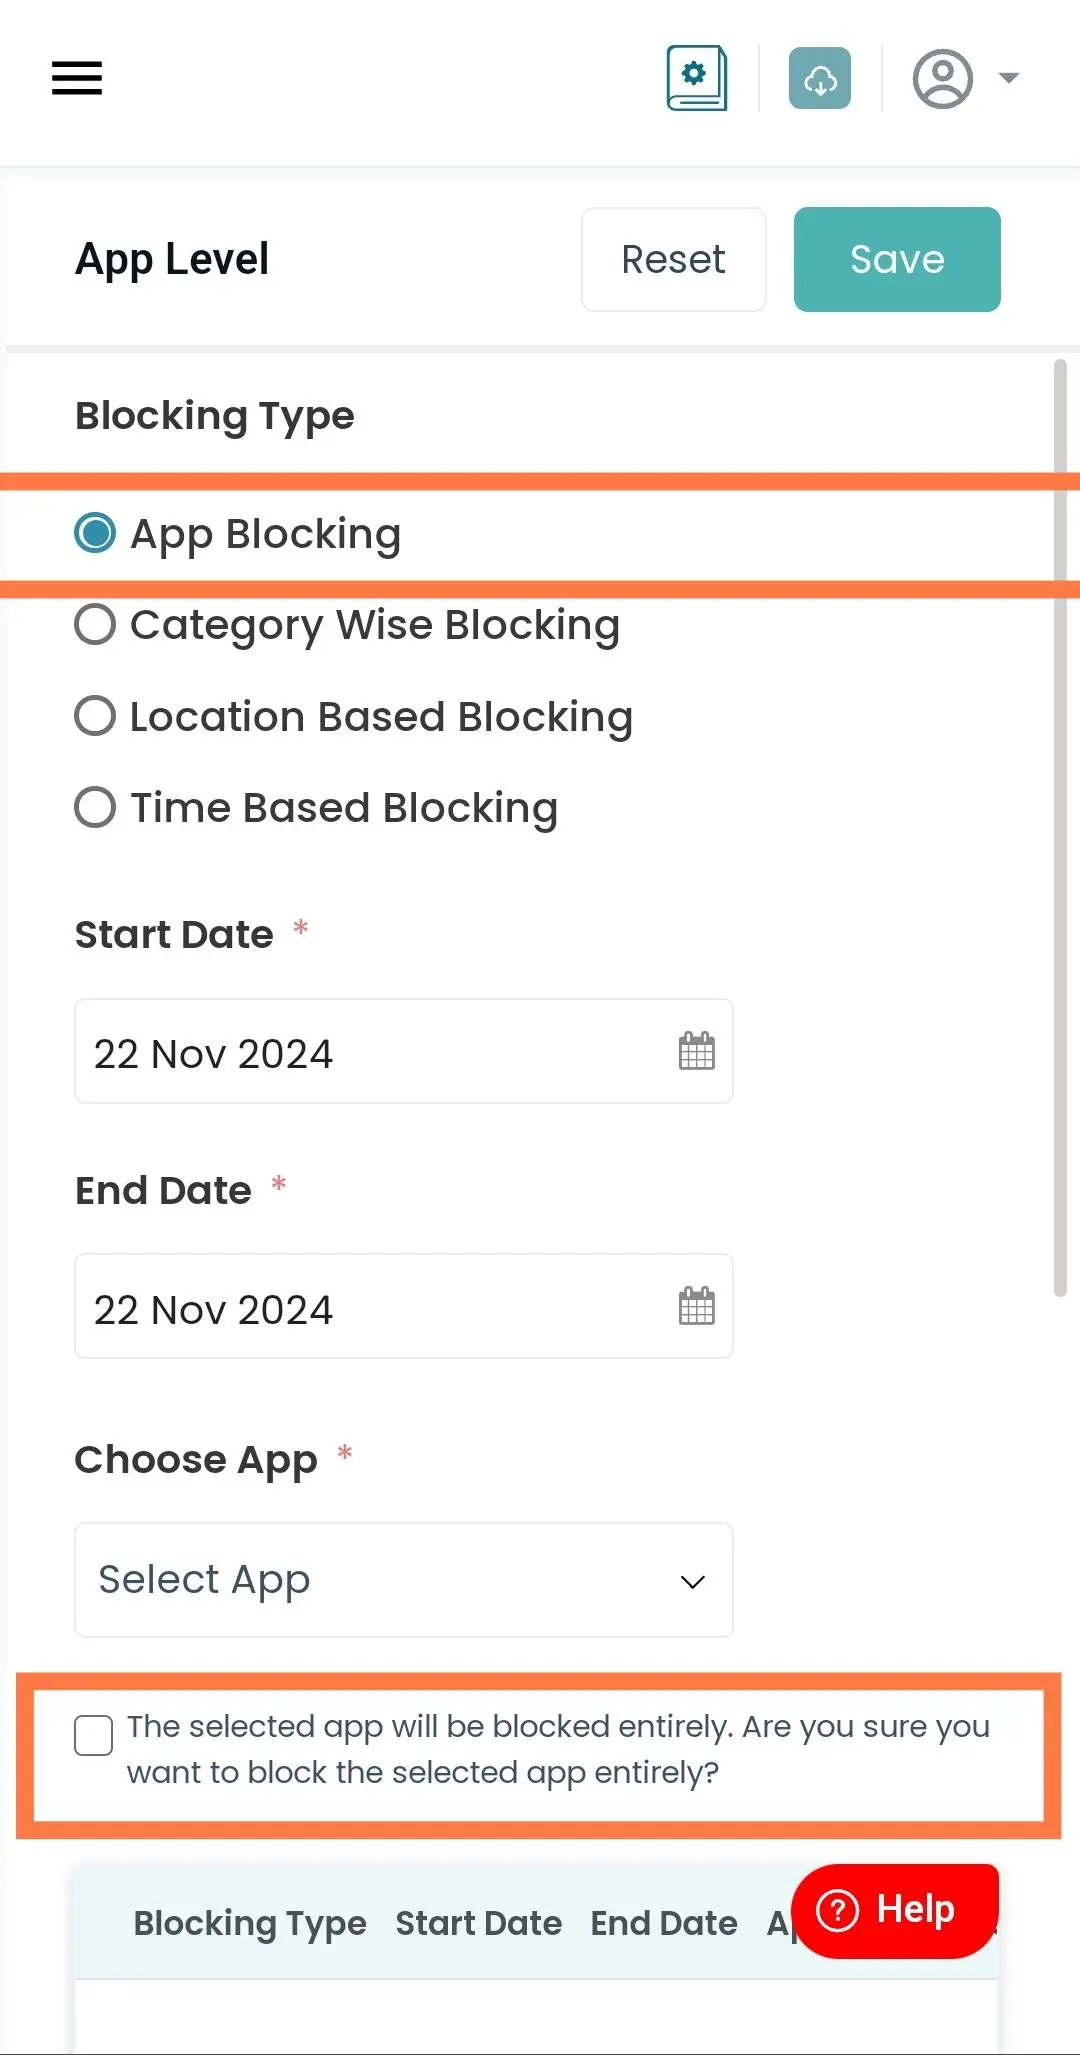
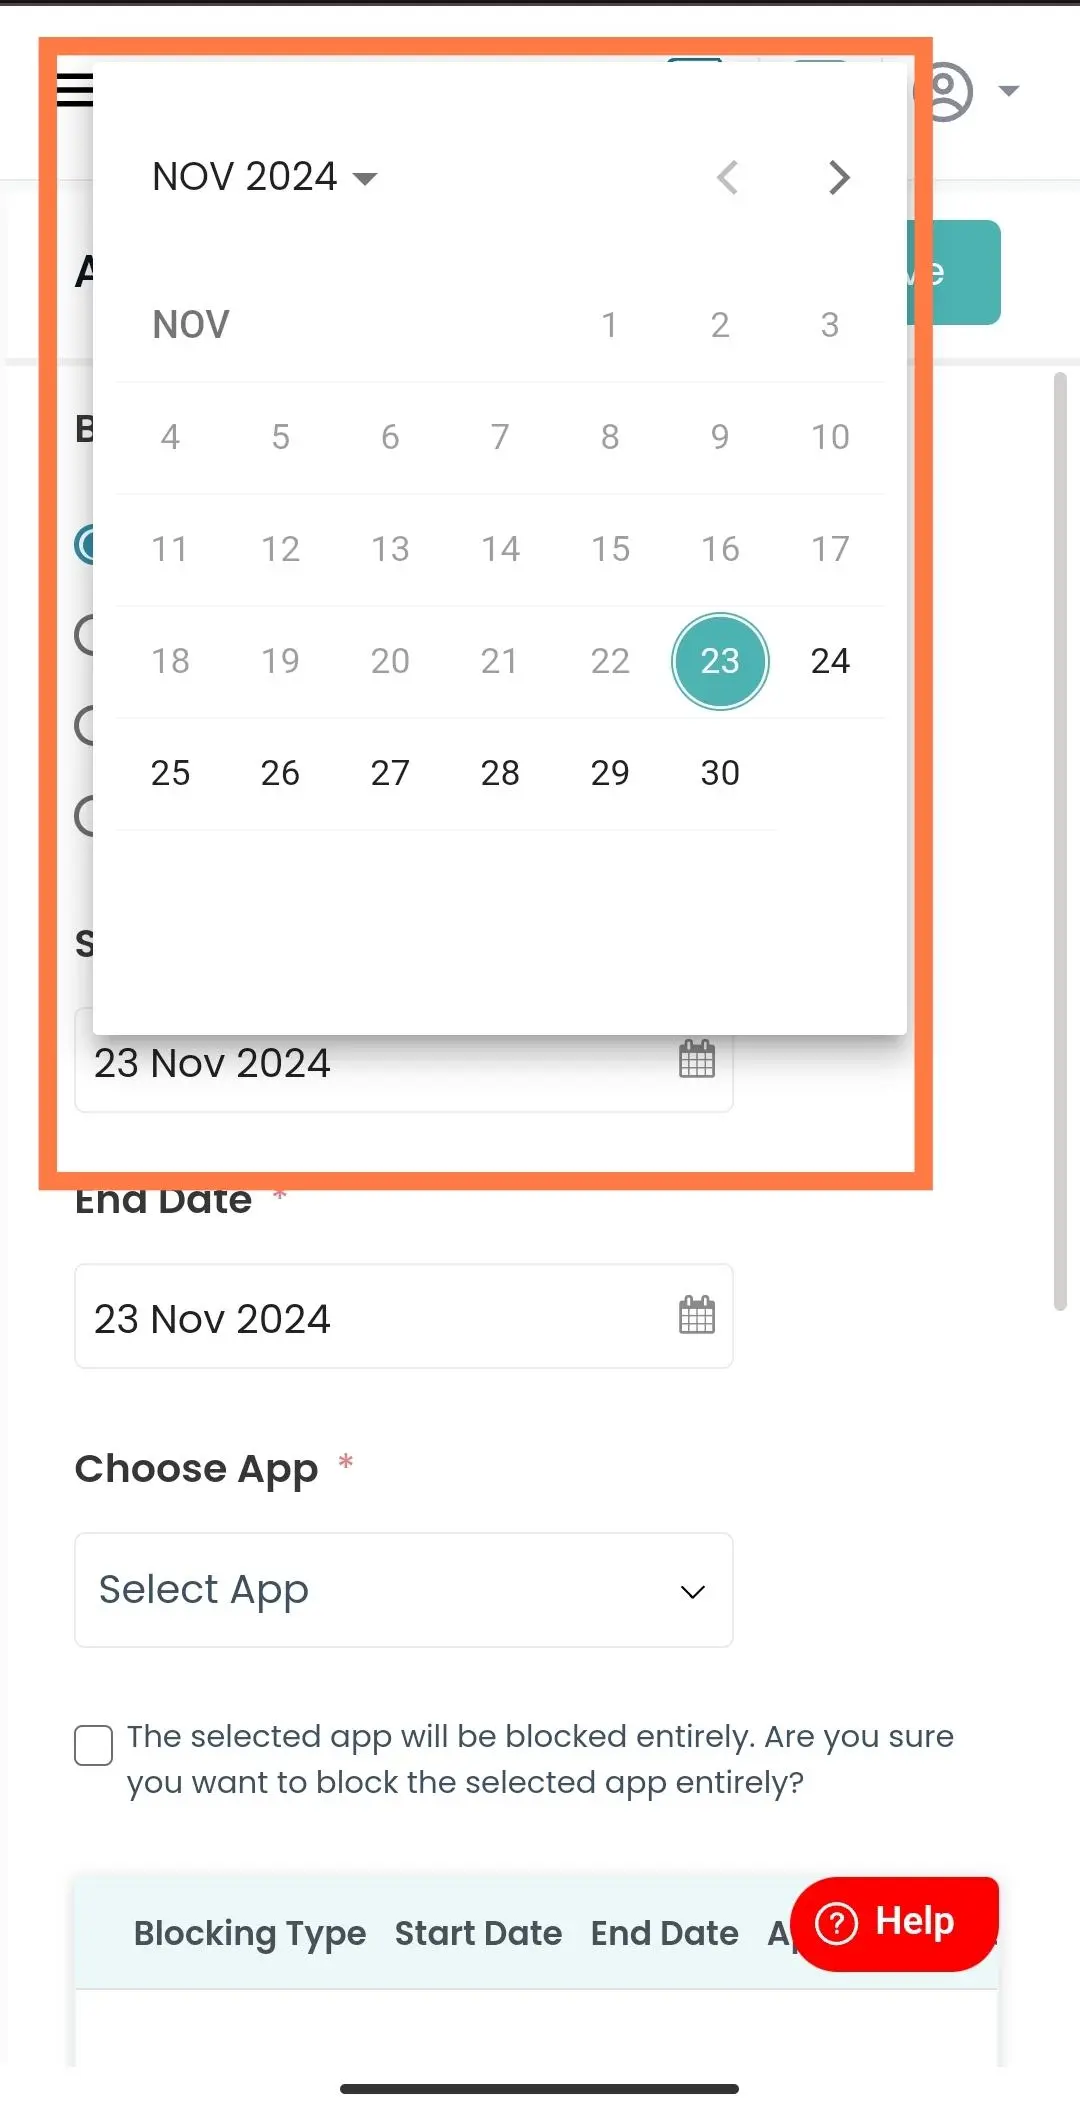
Set the "Start Date" and "End Date" for the blocking period.
-
Choose the app you want to block from the dropdown menu.
-
Click on the check box to confirm.
-
Click on "Save" to save your configuration.
-
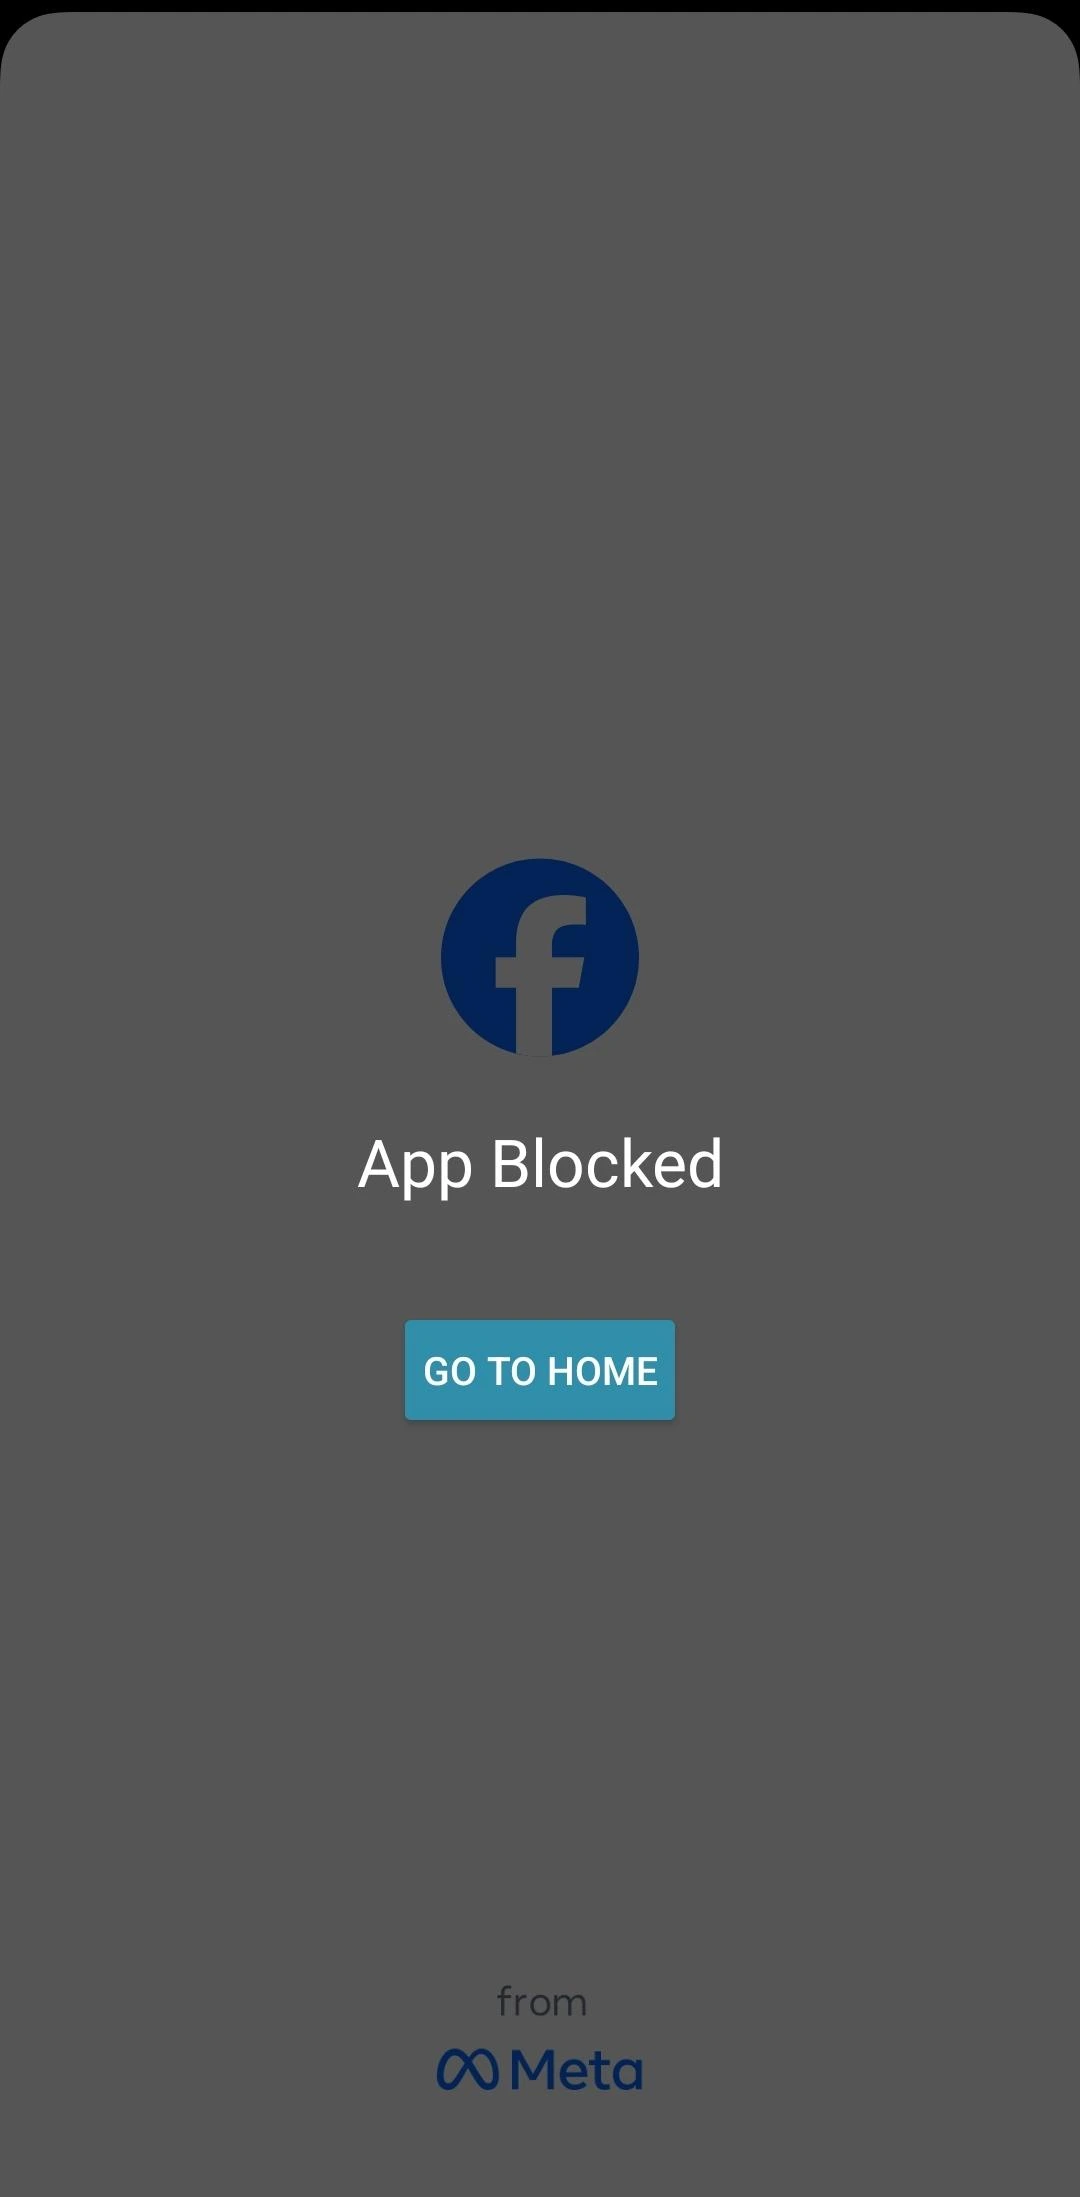
This is the preview of your Blocked App
2. Category Wise Blocking
Category Wise Blocking helps manage app usage by restricting all apps in a specific category,
such as Social Media, Games, or Entertainment.Users can block entire app categories during specific
periods,
ensuring control over app usage.
-
Visit inviztrack.com and login with your username and password.

-
Open App Blocking.
-
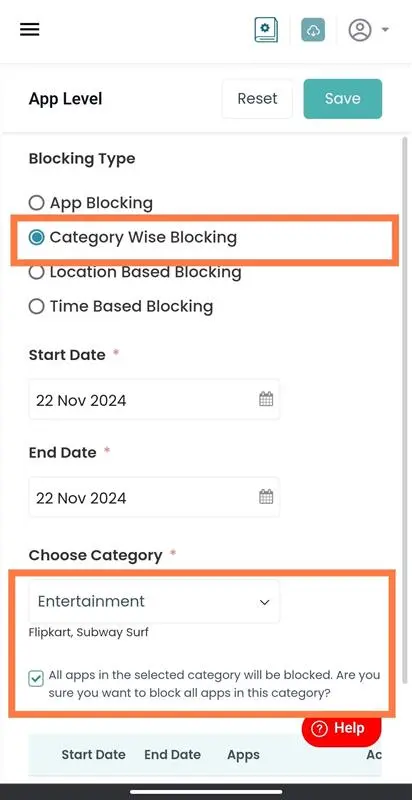
Select "Category Wise Blocking"
-
Set the "Start Date" and "End Date" for the blocking period.
-
Choose the app you want to block from the dropdown menu.
-
Click on the check box to confirm.
-
Click on "Save" to save your configuration.


-
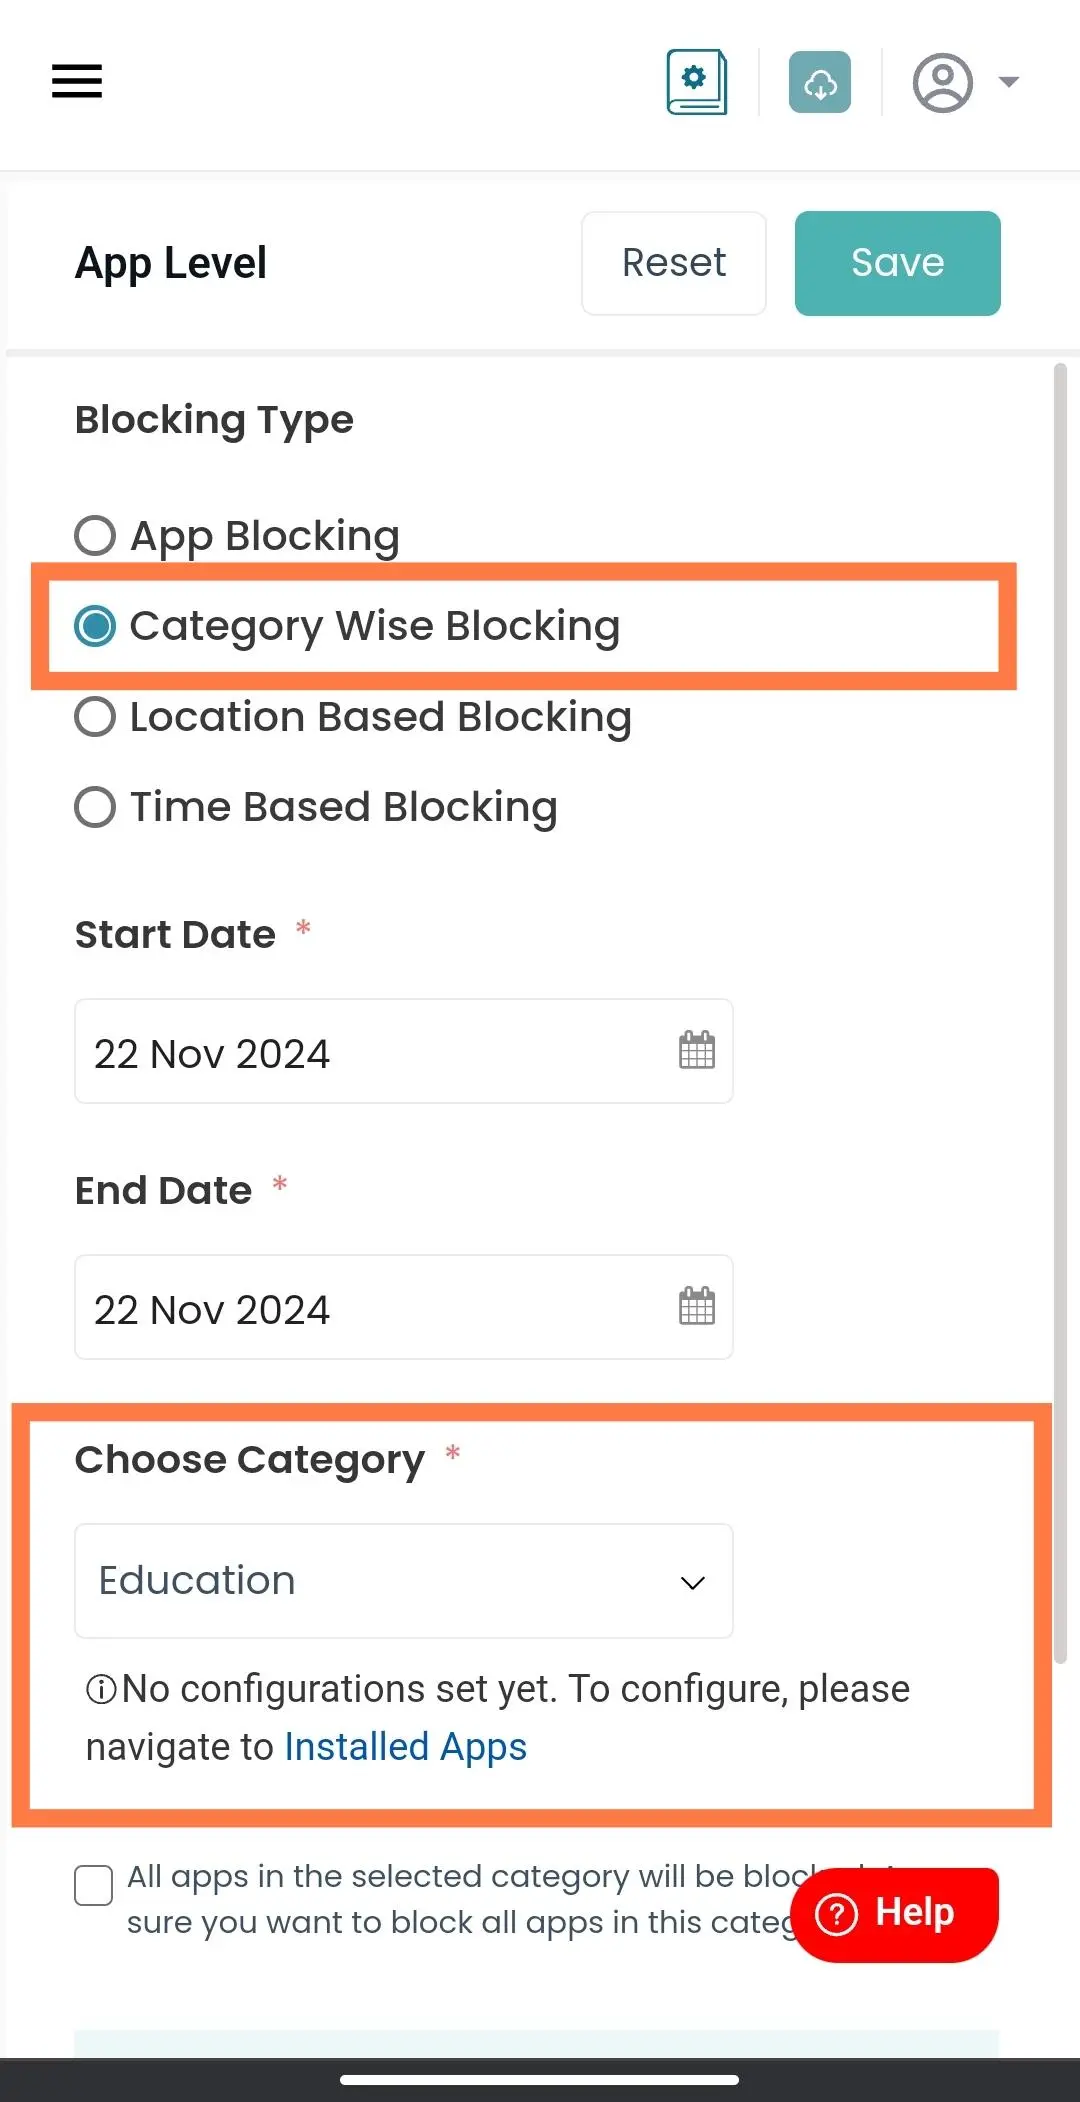
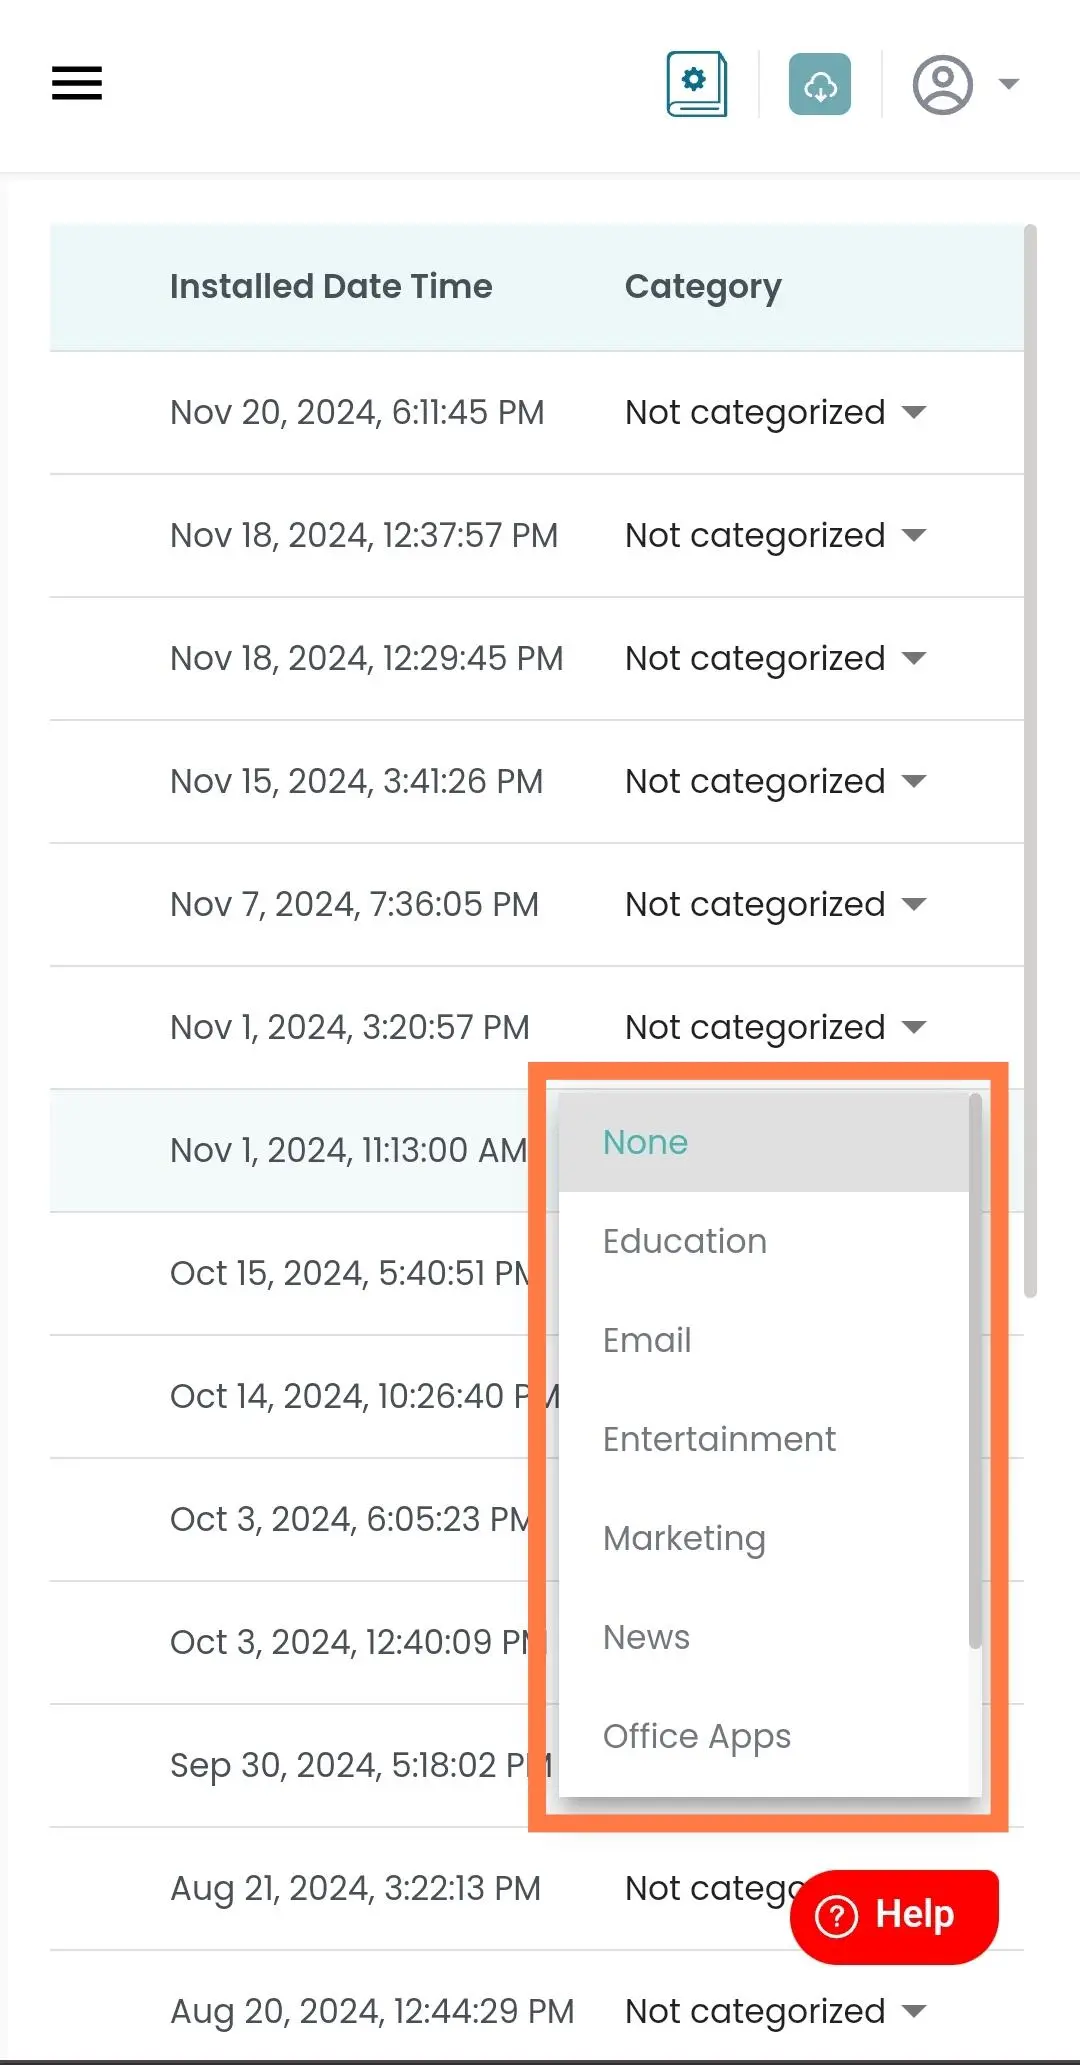
Note: If there are no apps configured for the selected category, an option will be provided for Installed Apps, where apps can be assigned to their respective categories.
-
Click on "Installed Apps".
-
This is the preview of your Blocked App

3. Location Based Blocking
Location Based Blocking allows restricting specific apps within a defined locations. The app will be
blocked automatically when
entering that location. This feature helps manage app usage based on physical location.
-
Visit inviztrack.com and login with your username and password.

-
Open App Blocking.
-
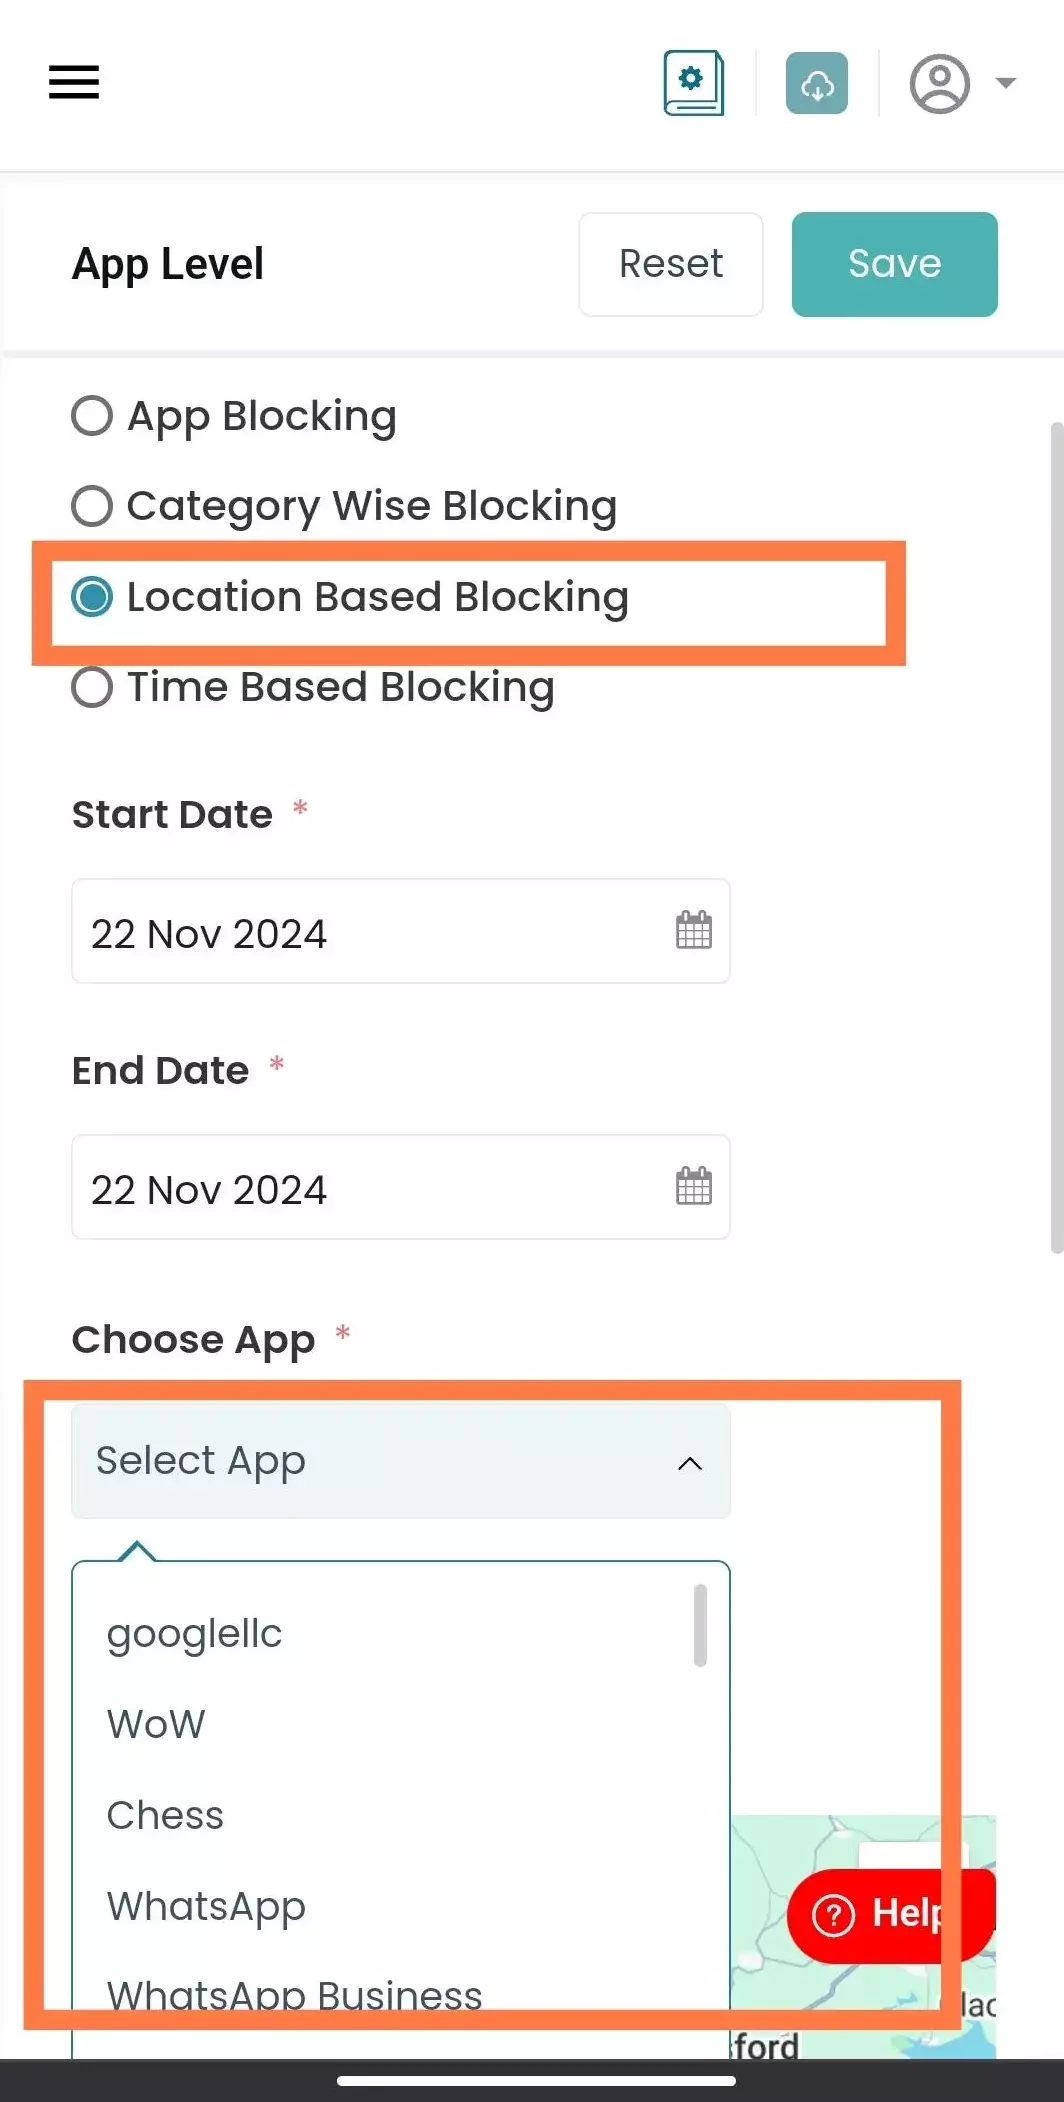
Select "Location Based Blocking"
-
Set the "Start Date" and "End Date" for the blocking period.
-
Choose the app you want to block from the dropdown menu.
-
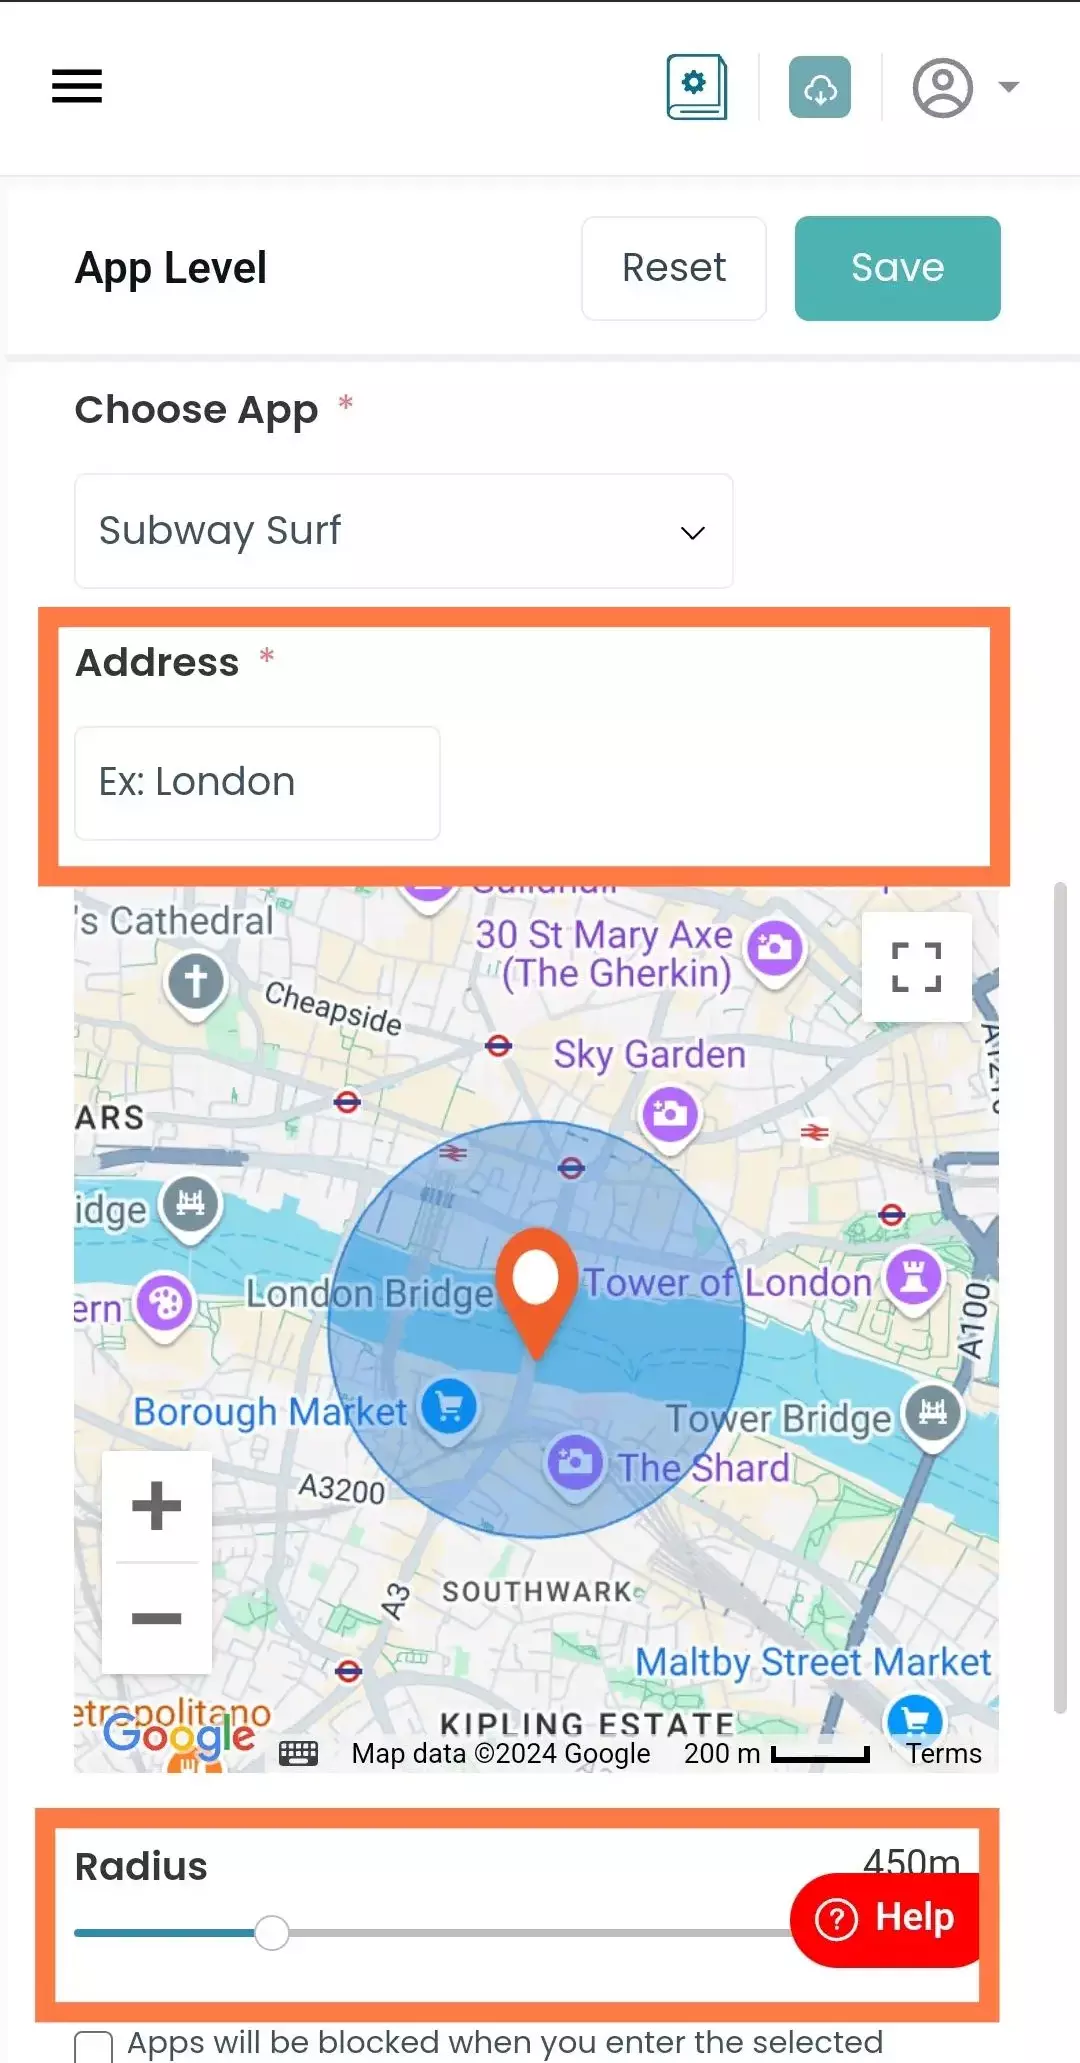
Enter the Address of the location where the app should be blocked
-
Set the Radius around the location for blocking the app.
-
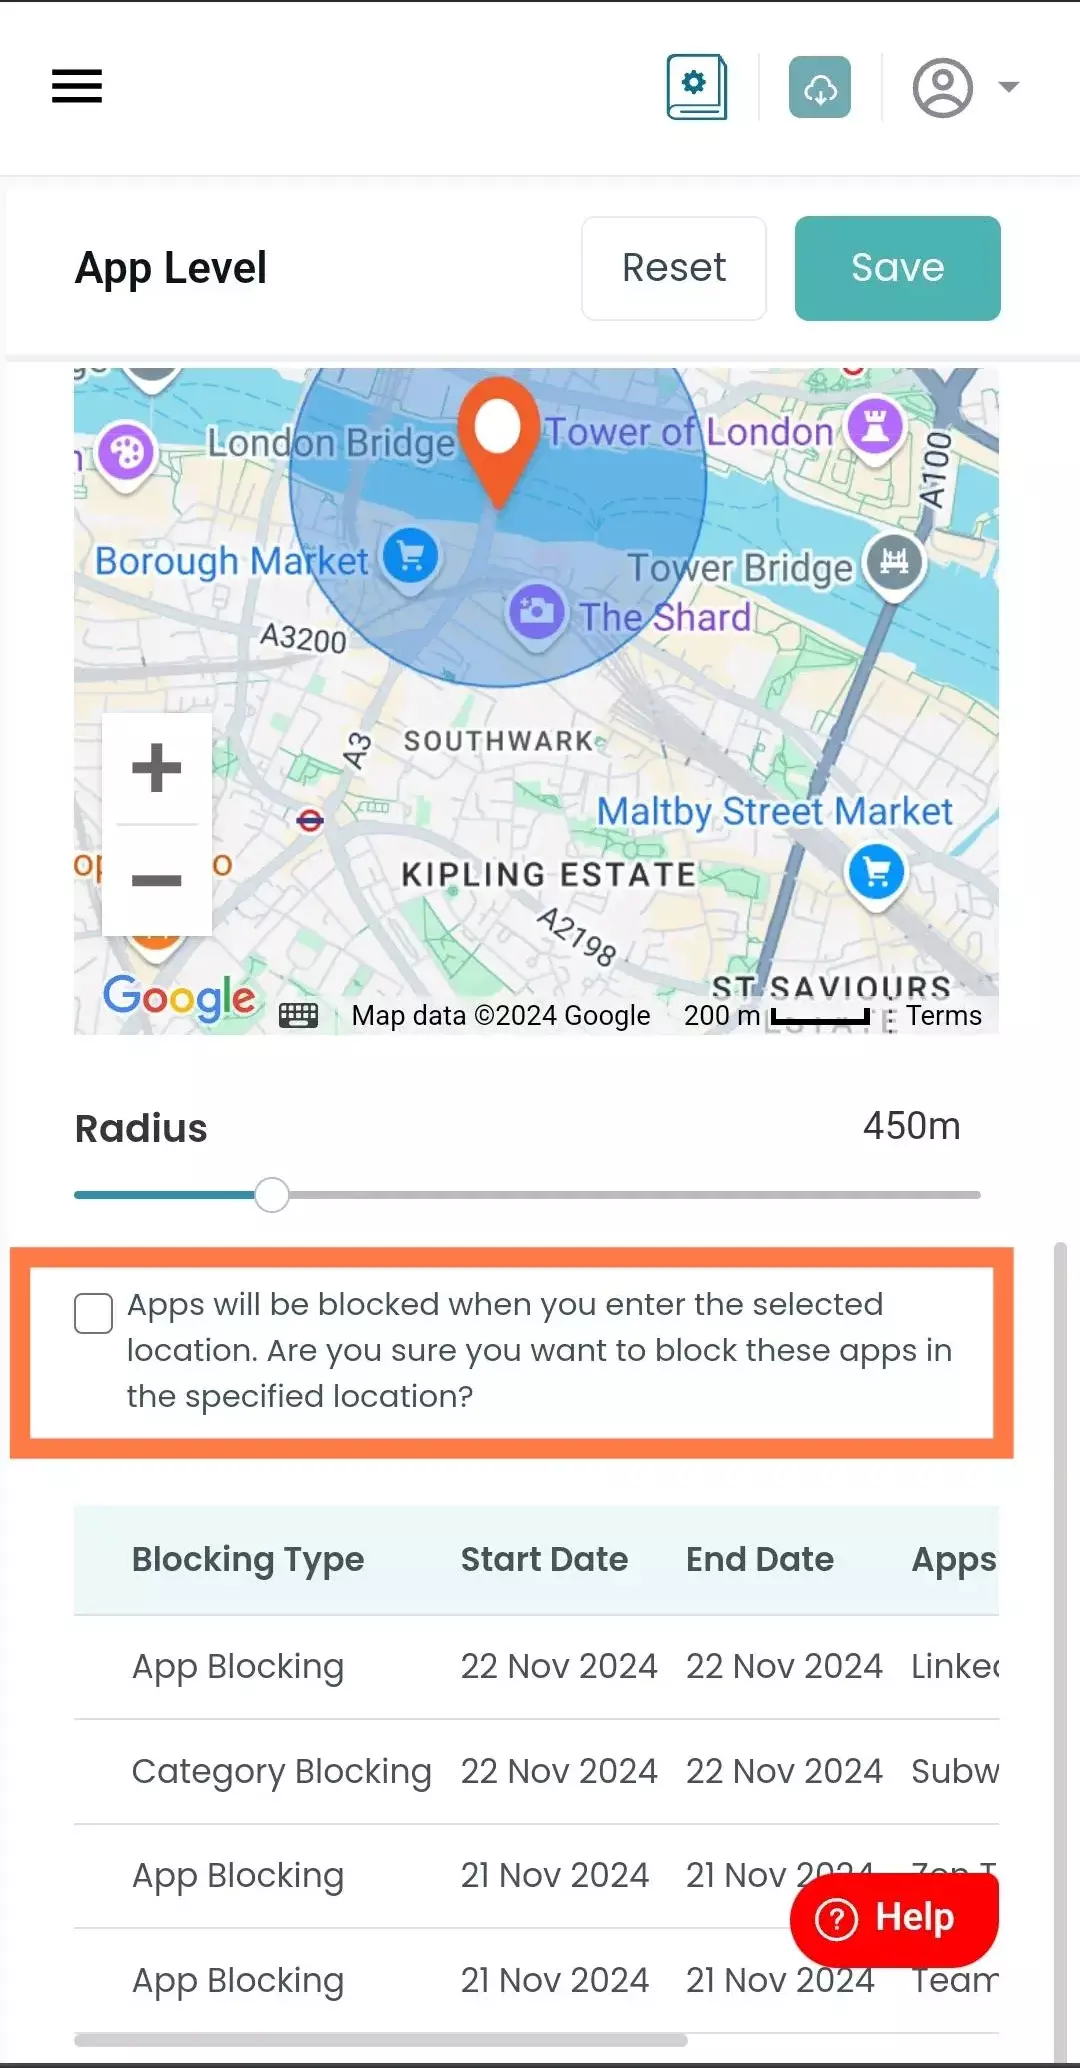
Click on the check box to confirm.
-
Click on "Save" to save your configuration.


-
This is the preview of your Blocked App

4. Time Based Blocking
Time Based Blocking allows setting a time limit for app usage. Once the set time
limit is reached, the app is automatically blocked.
-
Visit inviztrack.com and login with your username and password.

-
Open App Blocking.
-
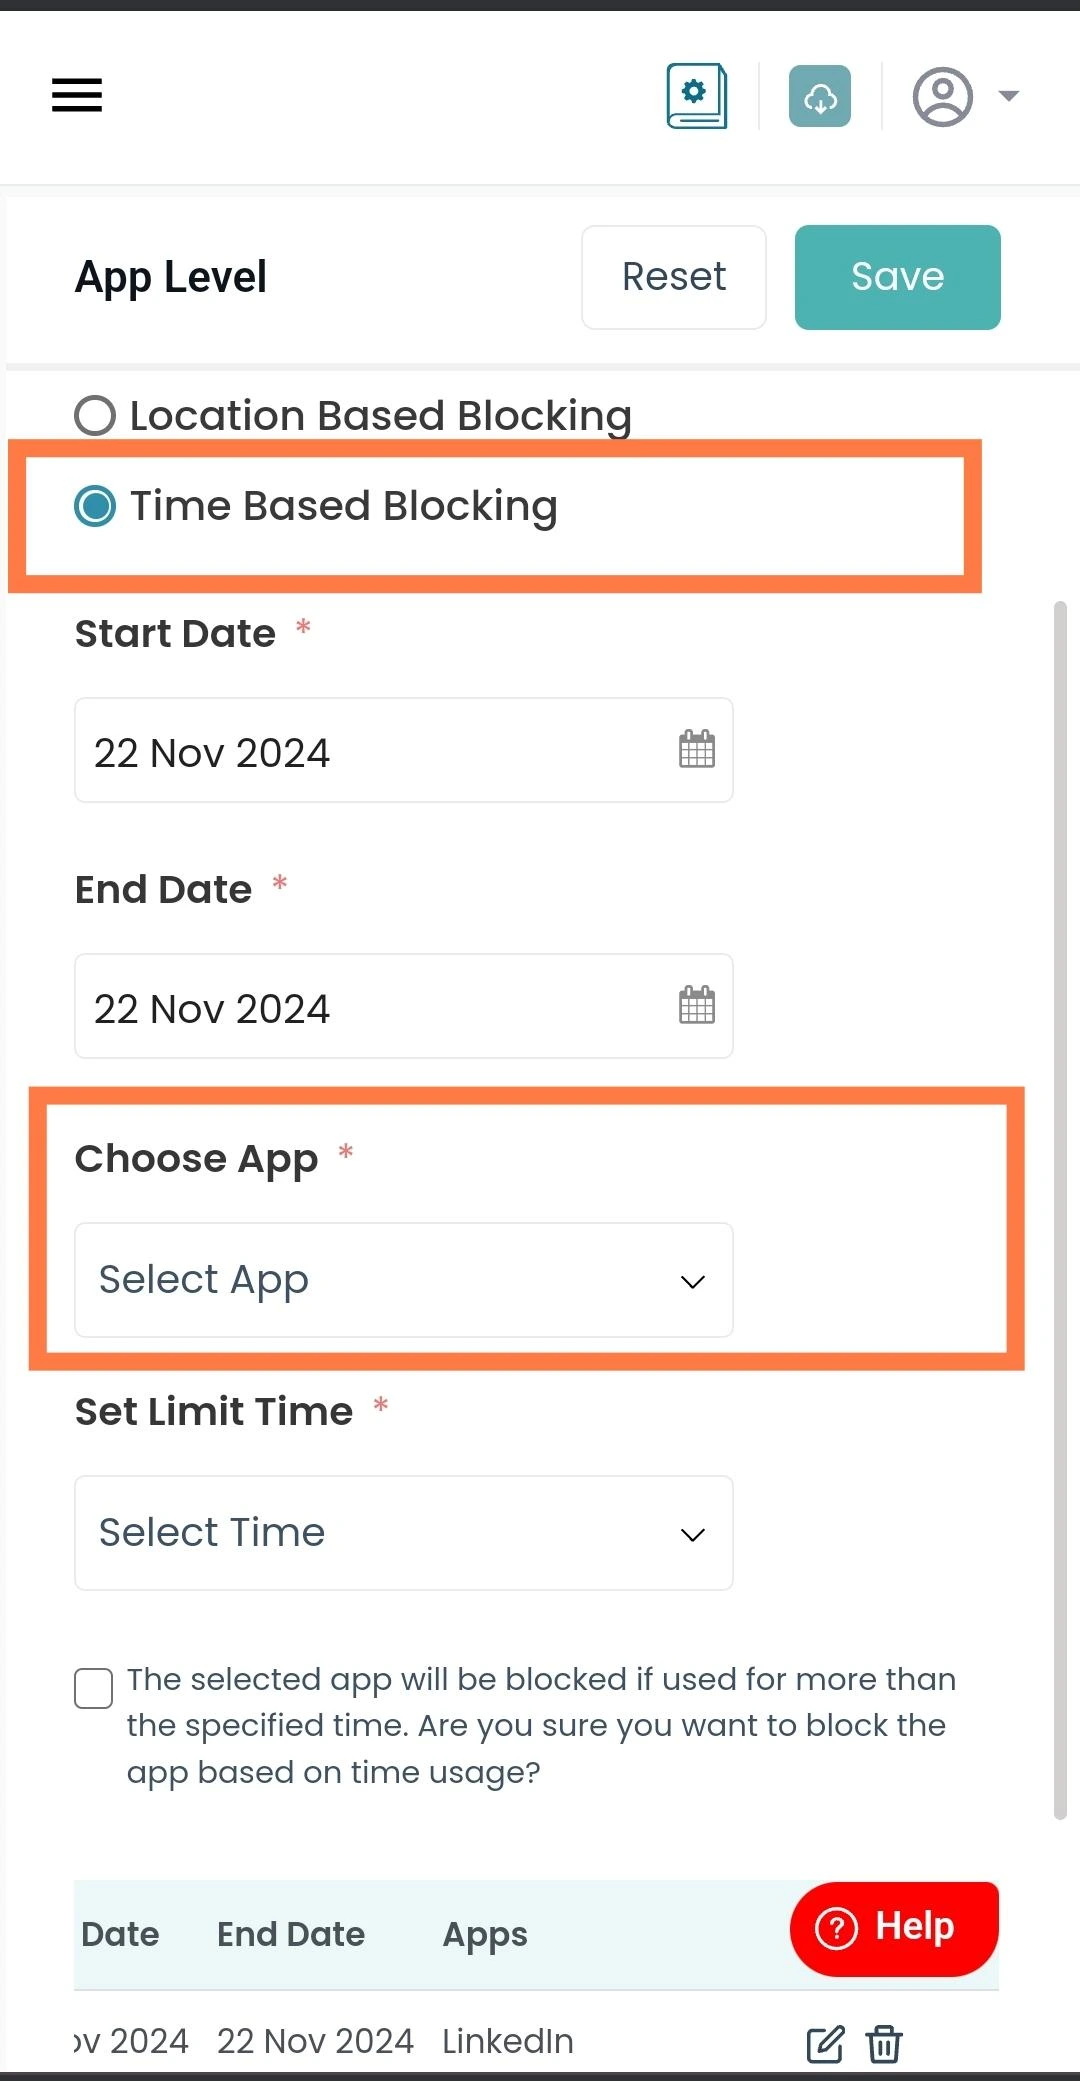
Select "Time Based Blocking"
-
Set the "Start Date" and "End Date" for the blocking period.
-
Choose the app you want to block from the dropdown menu.
-
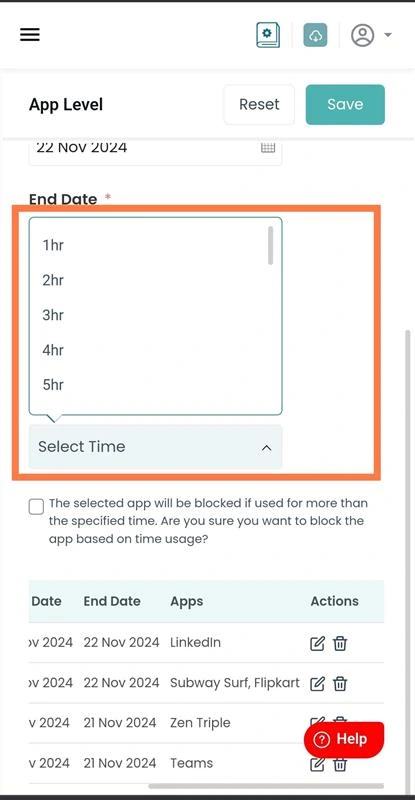
Select the Limit Time (the time limit for app usage) from the dropdown menu.
-
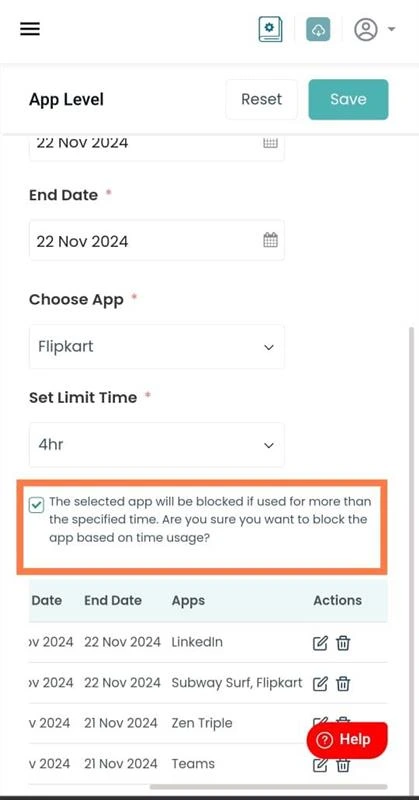
Click on the check box to confirm.
-
Click on "Save" to save your configuration.


-
This is the preview of your Blocked App

Managing Configurations
All the blocking configurations are displayed in a table with the associated Apps.
-
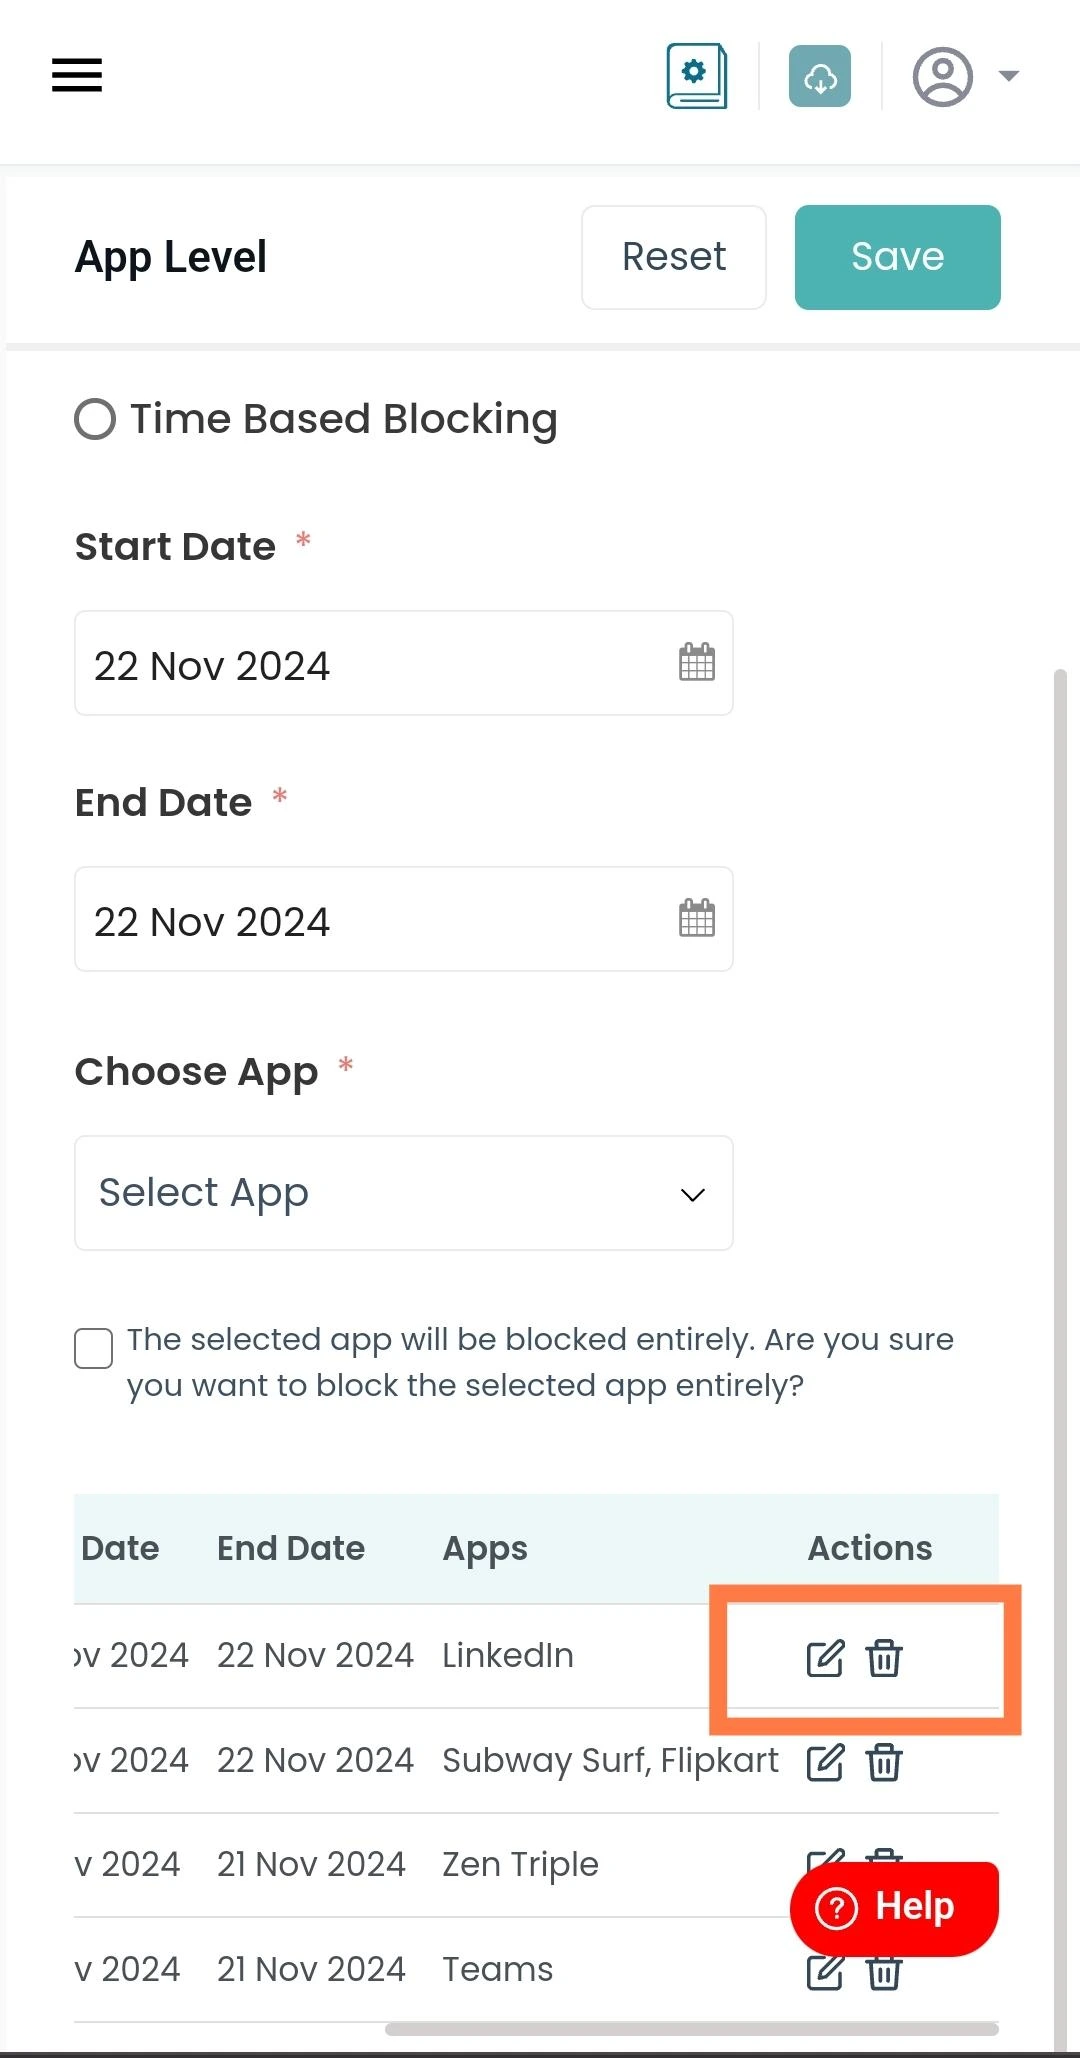
To Edit a configuration, click on the Edit icon
-
To Delete a configuration, click on the Delete icon
